Showing posts with label intermediates. Show all posts

Wednesday, September 22, 2021

Multimodal set up for Year 8 3D Design on Tinkercad

 Tinkercad is awesome at any time but during lockdown it is great. My students can do 3D design from home and they are supported by the lessons that Tinkercad make, taking you step by step through individual skills. What is also really useful is the "class" that you can set up. This makes it super easy to see the work the students are doing without them having to share it with you.

I have tried to set up my class site with step by steps and videos to help them with skills to go along with the Tinkercad ones, They can then see the steps being done on video. My Y8 group have just started learning the skills so I have been working through tasks with them as well as making them videos that they can watch in their own time. I have tried to keep my videos nice and short and to the point so they are targeted to specific tasks and skills.

Link to page on class site


Great blog post from Deborah, explaining one of her Tinkercad lessons.

Sunday, September 19, 2021

Lego Algorithms

 My Year 7 coding class are learning what algorithms are. As we are on lockdown at the moment, I am thinking of things they can get stuck into at home.

As I am busy building Lego at the moment, following the instructions, I thought we could have a go at making our own Lego instructions for someone else to follow.

Here is where the work is set up on my class site.

They can choose what ever they like to build and break it down into what steps are needed to get it across clearly to someone else.

I have included a video for them so they can use remove.bg to get rid of the backgrounds in the photographs of their lego pieces.


Here is my example step by step to make yellow boy.


Friday, September 17, 2021

Using Wordwall for Learning New Words

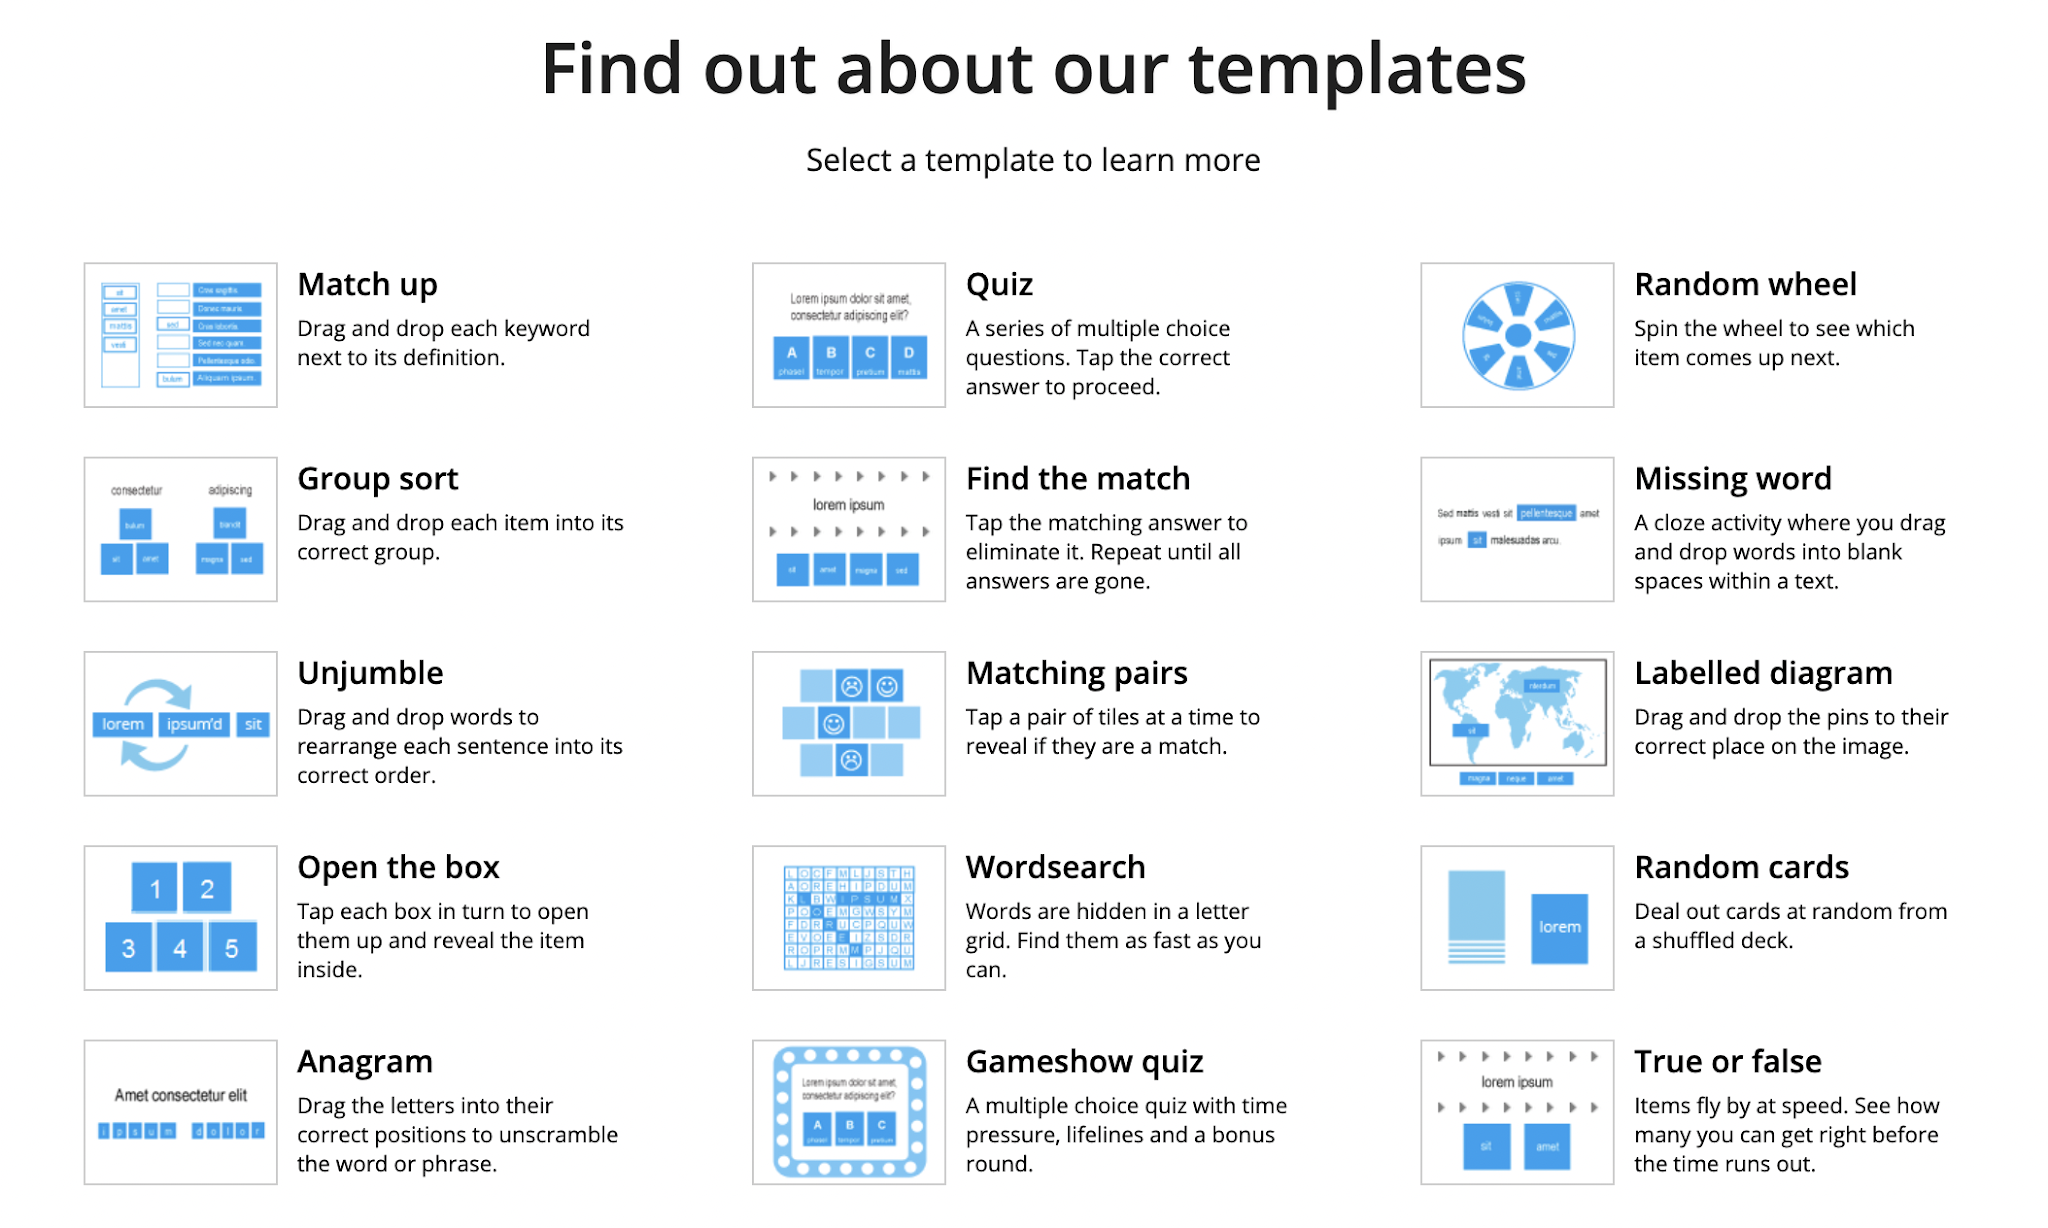
Today, Mr Cunard in our PE department played a game with use using the flip grip option on Wordwall. He then shared the link to the website. When I checked it out I found there was a load of options and templates to choose from.


I decided to try the Match Up template to have a go at a word game for my Y7 and Y8 coding classes.
It was easy to put the words and definitions.


You can send the link to students via their email, so they can play the game in a browser window or you can grab the embed code and put it onto your class website, which is what I've had a go at here.

I made a video to explain.

Wednesday, September 8, 2021

Prepping to Learn about Algorithms

 My two new intermediate coding classes have got to learn what an algorithm is. They have to know and show what this is both in a non digital and digital way.

Link to algorithms page on class site


I have started with them finding three things that they know about and breaking them down into input, algorithm, output. I have made an example for them to look at and made an explanation video for them to watch after the lesson to remind themselves what to do. I also found a good explanation video on YouTube.

The second activity on this page is to be done in their own time while we are in lockdown. They have to write instructions for someone else to follow. They then have to analyse how it went and write up any changes they would make to improve their instruction (debugging).

I have written these activities to line up with the tracking document linked to the Progress Outcomes. Blog post here about this tracking sheet These activities are linked directly to Progress Outcome 1.

At the top of the site page, I have included some extra reading for the students and extra activities for them to try.


Tuesday, September 7, 2021

Online / Distance Learning - Graphics with the Intermediates

 We are on lockdown at the moment, and our classes with our intermediate students are still going ahead.

My Year 8 graphics class are making a start on the clock design project. I have been working on elements in my class site for them so what is on there is more useful and supportive.

They have been coming online for our weekly lessons, so I have been making support material to help them continue when they are not with me or they need reminding about what I have just shown them. This hopefully will help the students who are unable to come online too but it will definitely help when we are all back at school as they will all be at different places in the project.


Over the last two weeks, we have been working on -

The links go to where the work is on the class site. There is instructions, templates, examples and explanation screencast videos.

Link to whole project - as of writing, the support materials have only been added to the above sections.

We are not connected as a class via the Hapara teacher dashboard, so we keep a class shared spreadsheet. This is also useful as I can put the links to everything there for them in one place so they can get to their work and support material quickly and easily.
This is the same spreadsheet from the start of todays' class to the end showing the difference in how much work they have done.


Here are a few blog posts from this work


Sunday, May 23, 2021

Maths in Y8 Coding

 This week was the last week of the Technology rotation for my Year 8 coding class. I have taught them coding since they were in year 7 and we have had a lot of fun.

For the last couple of weeks we have been playing with the Microbits. We have also been playing with mBots and Drones over the last couple of years. I am a Graphics teacher and I have only been teaching coding for the last two years, so I am learning as i am going with the students. Here is my planning on my class site.

This week, we made the Microbit into a step counter. They had to code their microbit to count each time it was shaken and show that number on the LED's. They then had to stuff it down their sock and go outside and test it.

They had to analyse if the step counter was counting one leg or just the one. We then discussed what differences to make if they thought it was just counting one leg.


The next step was to get the Microbit to measure how far they had walked. The students measured their stride, then changed the number being shown on the Microbit to that stride length multiplied by the number of steps.


To test this, the students went into the carpark with rulers and chalk and marked out a 3 meter line so they could walk down that and see if the Microbit was saying the same amount.

Here they are out in the carpark doing the testing. It was pink shirt day on this day which is why they are looking really pink.


Here is the class and me looking very pink.


Monday, March 1, 2021

Intermediate Technology - With No Contact

 We have gone onto a week long Level 3 lock down in Auckland this week. Last week was the first time we saw our Intermediate classes for technology this year and now we won't see them this week. When we were on lockdown last year, our Intermediate classes got all of their links to our class sites and work from a central hub site so it was easy for the Intermediate teachers to send to the students at home. 

For this week, we will not be seeing them on an online meet so our work needs to be easy to access and understand with no input from the technology teacher. Their class teacher will be giving the students the hub site link to access at home and out work needs to go straight from there.

I have decided to give them work that we would be doing anyway in the project, just not yet if things were normal. We are designing and making models of pop up books in Graphics and one of the things the students need to do is think about different themes for their book. This is an easy task to do online on a Google Drawing and the students all know how to use them. I have included a short help video, just to go over the task in a screen cast and to show them a quick tip to get images with transparent backgrounds.

Link to page on class site


Friday, June 26, 2020

Coding Matariki Stars with mBots

This week we have been celebrating Matariki and we have had lots of activities and competitions. Many of these activities involved the theme of stars so  decided to continue this theme with my Year 8 class this morning. We have been coding our mBots to move, make noises, make lights come on, react to sensors. Today, we were coding our mBots to move in a star pattern.
First of all, we drew stars on paper without taking our pencils off the page.
Then we looked at what we would need in mBlock to code the star. They already know the repeat block.
These were the blocks they needed to use. The tricky part was setting the variables to the correct values so the mBot will turn the correct amount on the points of the stars.


The students showed fabulous resilience today and went about the task of trial and error really happily.
We went out into the carpark about half way through. We drew big stars on the ground and walked the path so they could feel the actions that the mBot needed to take.
When they were testing the movement of the mBots in the class, we decided to tape a board marker pen to the front so it could draw on the table top. The students could then see the motion clearer and see what changes needed to be made.


. 

The students have been writing this up on their blogs and explain it much better than me.

Florence
Giovani
Karlos
Sakshi
Ellenora
Akuhata


Friday, May 1, 2020

Using the Tinkercad Class Feature

I have used the Tinkercad class feature for the first time today. It's great. Really useful.
I have used Tinkercad a lot with my intermediate classes and to be honest, getting them to make their own accounts has always been a bit of a pain in the bum. As we are working / teaching / learning long distance from home at the moment, we didn't need this added stress so I thought I would give the class feature a go. Why didn't I try this before??

I put basic instructions of what to do on the class site and then realised that the Tinkercad class gives us a unique url to use to get tot he class. So that was even easier as I could put a button on the site for the students to click on. Then all they needed was the nickname in the class (Tinkercad just used their first names) and we are good to go.


There will end up being two buttons here after next week for two different classes, but this will be ok as they can only get in the class where their email is set up so it won't cause a problem.

It is easy to get to the classes that i have set up. It is just a button at the top of the page.


My two classes that I have set up so far are there. I have just tried it today with one. 


Then the really good thing is that i can see the work that have been doing on the dashboard, where I also have access to open the files too if I need to.


This is going to be a HUGE help over this working / learning / teaching from home period as I am planning on using 3d design with my Y9 and Y10 classes starting next week as we have new Technology rotation groups with our junior classes.
Thank you Tinkercad :D

Tuesday, April 21, 2020

Trying to plan for limited contact

During our teaching and learning from home experience during the COVID 19 lockdown, I did not really know how much contact I would get with my intermediate classes. I have two Year 7 classes from two different schools, so I wanted to plan for something they could do without me if necessary and if I got to see them, then that would be a bonus.

With my usual classes, I can put work onto the class Workspaces but I can't do this with the Intermediate classes. We tried it with them last year and to be honest, it was a bit of a pain in the bum.

I have set up a page on my usual class site for this purpose and I have made step by step presentations and screencast videos to take them through the tasks. It is all based on learning and using Tinkercad skills for 3D design.

Link to the page on the class site.
The baby Yoda theme and Star Wars style lettering is just a given with me.


It turned out that today I got to see quite a lot of them. Their lovely class teacher set up a meet and I got to talk them through this and help them for an hour this morning. We had fun.


Friday, March 20, 2020

Binary with Year 7

My Year 7 coding class are learning to make their mBots become autonomous cars. Part of that is to use the infra red sensor underneath the mBot to sense and follow a black line. To do this, the students need to understand a little about binary.

We started today talking about how they counted.
They all started counting for me out loud.
Then I asked them to add two single digit numbers together in their heads. Easy peasy. Answers were shouted out. Then I asked them to add 9 and 23. This took a bit longer in the head, and fingers were twiddled and counted.

Then I asked them to addf 329 and 73 in their heads. Some got there.
This was then written as sum on the board and they were all comfortable again.
I asked them how we know where to put the 73 under the 329 as they are different widths / numbers of digits. They then told me about units, tens and hundreds. Their teacher at intermediate will be proud of them.


After they had mentioned the units, tens and hundreds, we talked about how we count.
The name was DECIMAL as it is based on 10's. Every step to the left is 10 times bigger. We put numbers in them place slots tos ay how many of them there are of each.


I then introduced a new counting method. BINARY.
I used the class light switch as an example. How many switch places are there? 2. The switch can be on or off. The lights can be on or off. There are no threes or fours or others numbers. It is yeas or no.

BINARY counts in multiples of 2. I put the columns up to show them the difference. Each step to the left is multiplied by two this time. We did a few numbers together till they got it. 


Binary Games

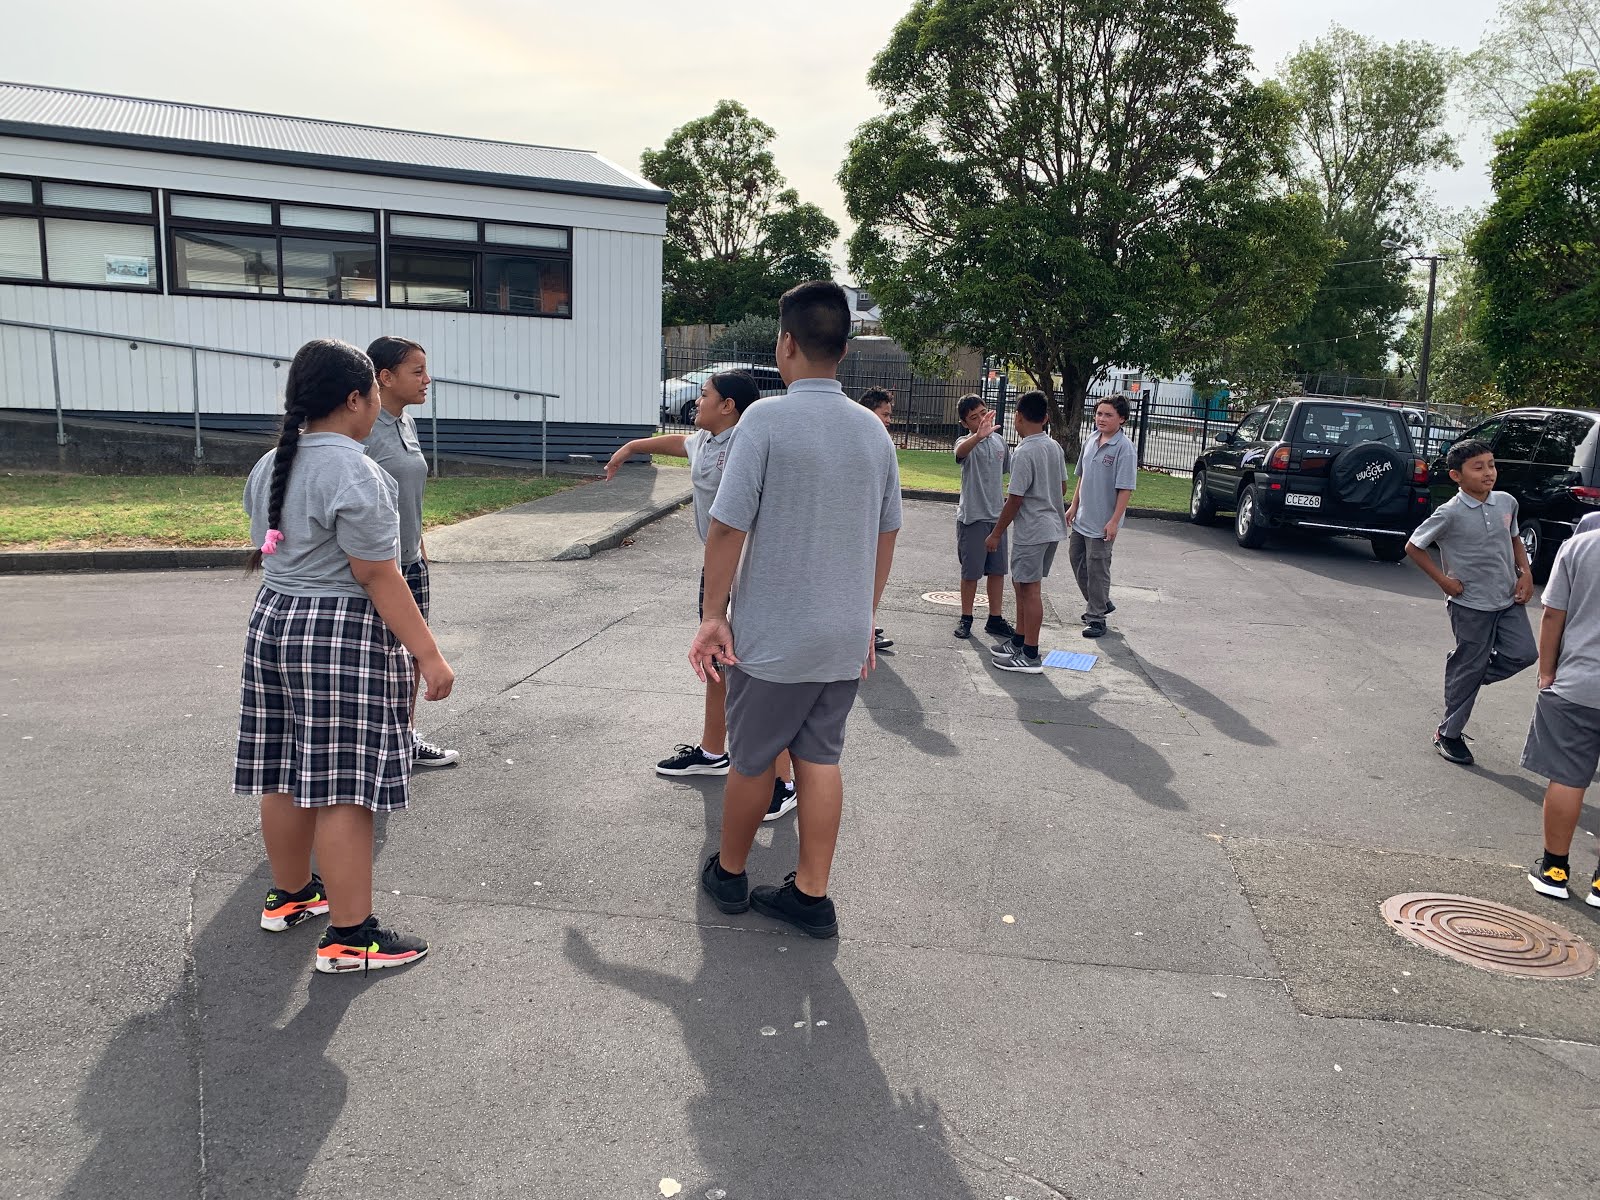
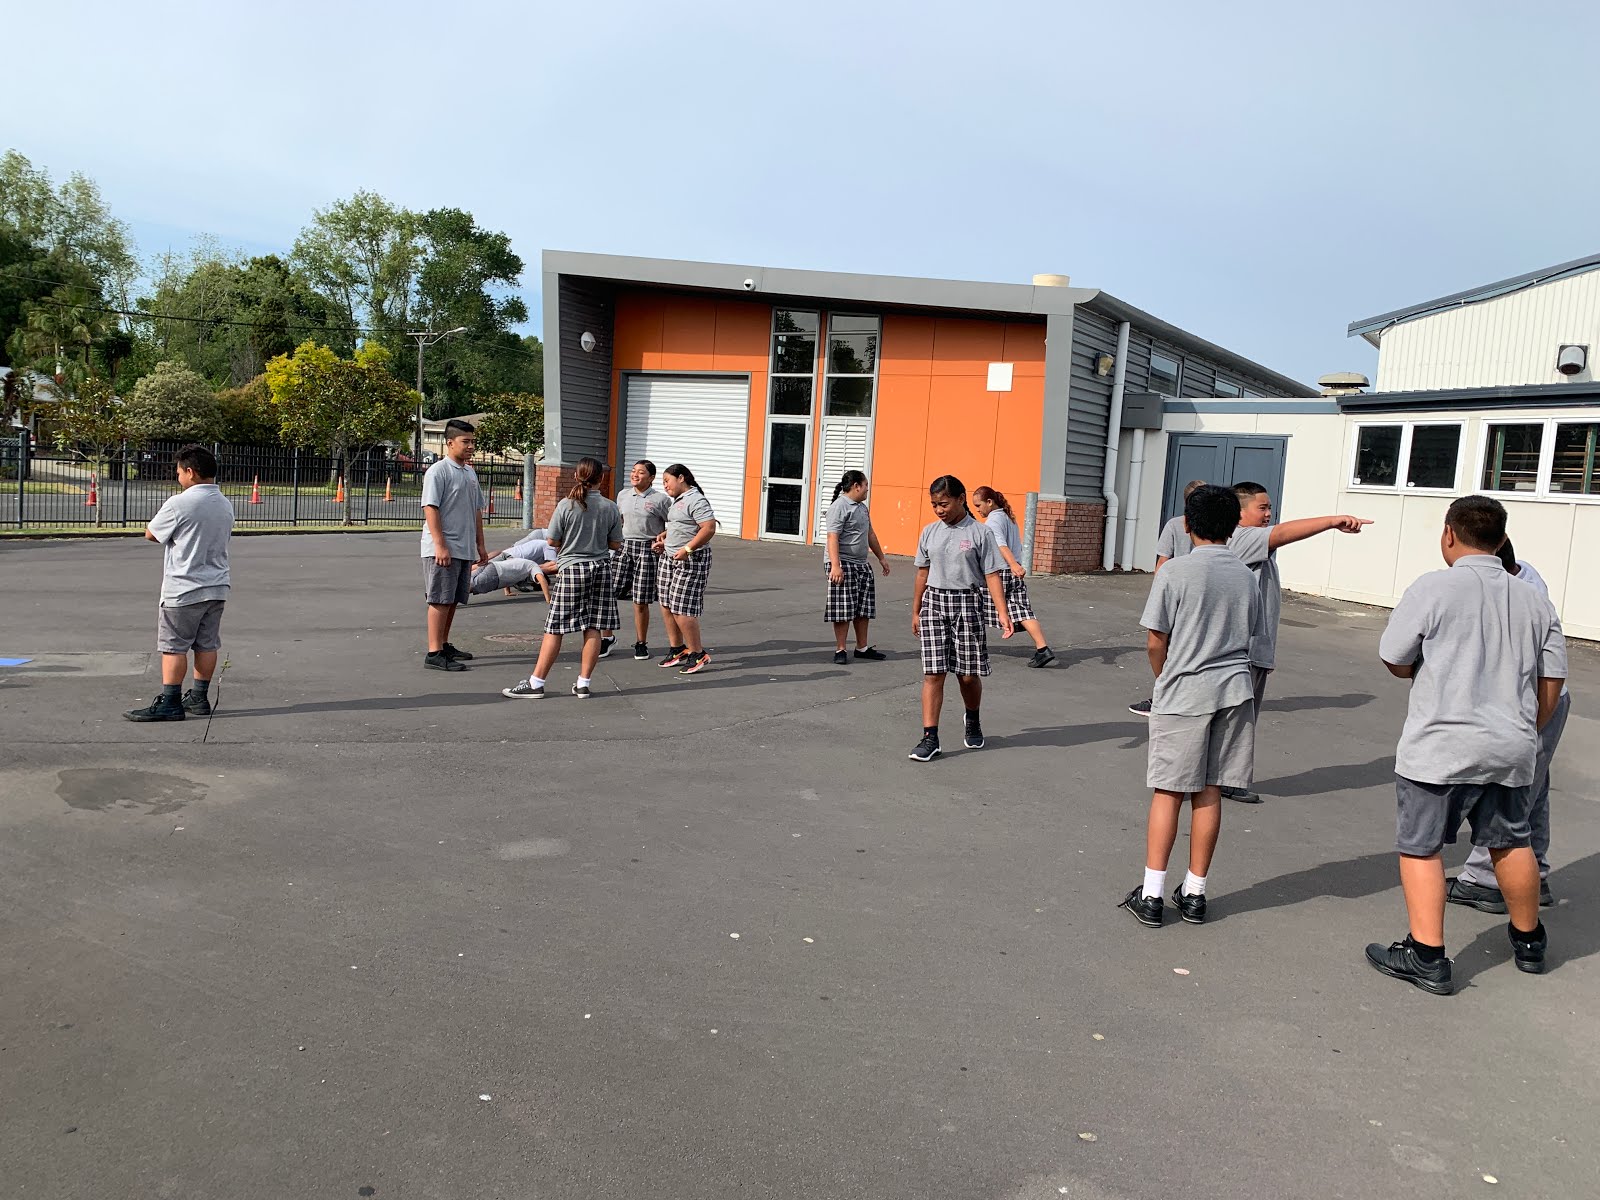
The first game we played was in the car park outside. The students put themselves into teams of four for the four columns we had been using in our binary examples. They each had two pieces of paper. One with a 1 on it and one with a 0 on it.
I wrote down numbers on a card and held it up. The teams had to shuffle themselves with their paper to be sowing the correct value in binary.


Here is a slightly chaotic video ...


When we went back into the classroom, I had some binary games ready on my class site for them to have a go at.
Link to class site where the binary games are.

I thought that they might not appreciate this lesson as we did not use the mBots today, so they go no direct coding done. They did play some of the coding games that I have on my site too, but did not code the mBots.
Next week I plan to "test" their binary knowledge to see if what we did today was ok. This "test" will be in the form of an online quiz / game so they don't feel tested.
I hope this was enough for them to understand why we have to use a bit of binary when we code our rmBots to react to the black line.

Friday, February 14, 2020

Coding with Year 7 - Lesson 1

I have been preparing for my coding lessons with my new Year 7 class this year. I wrote a blog post here about how i was going to be looking at Algorithms.

Our first lesson was today, and after  we all got on my new website, found the work and I had given them a brief description of what an algorithm is, we all went into the carpark to try some out.


  • They got into small groups and decided who was the programmer and who were the robots.
  • Instruction 1 - The programmer had to give their robots one instruction and watch them do it then give them another and so on.
  • Instruction 2 - The same as one but they had to give two instructions.
  • Instruction 3 - They have to give 3 instructions bit include more details like direction and how long or how many.
  • Instruction 4 - They have to give 5 instructions, include details, one has to be sound, one movement in a line, one a dance movement
  • The programmer had to give the "algorithms" and the robots had to listen and remember a sequence of instructions.
We then got on with the rest of the prepared lesson as it is on the class site. We didn't get as far as I had planned as we spent a little more time playing in the carpark than I intended.

Things to note for next time :-
Check the mBots are charged - we had a couple of flat ones today
Check the boxes all have 6 in them - there was one with 3 today
The link to a copy of the presentation worked well and saved time.
They all got online fast and found the site and work very efficiently.


Wednesday, February 12, 2020

Preparing for my first Year 7 Coding Lesson

I have my first coding lesson with a year 7 class on Friday.
I have had some experience of teaching coding last year to a Year 8 class last year where we were making an mBot robot follow a black line using sensors.
Blog post 1     Blog post 2
With this, I was using the planning of Mr Dunn as he had been doing this with other Year 7 and 8 classes.
This is my first year planning for it myself.

To start with, I am going to talk to my Year 7 group about what an ALGORITHM is. We will relate it to real life things that they know about and my example will be knitting.

Input - the wool, the algorithm - the knitting pattern, output - a jumper.

This table is what we will fill in with everyday examples. Link to Google Drawing here.


Then we will move on to having a bit of a play with the mBots and a first go at using the mBlock software.
This is the link to my site where I have put all of the activities for this.
The activities are listed on the drop down under Y7 and Y8, coding.


This is the presentation with the first coding activity for the mBot. We are making coloured lights.
I have set it up so it is very visual (I am a graphics / design teacher!!) and so they have to put evidence of their work and thinking as we go.
This one is very simple in order to get them used to using the mBot, the online programme and having to evidence their work with screenshots, videos and analysis of what was happening.
This needs to get more complex as they get experience so they can start deeper analysis of what they did, what happened, what went wrong and what they did to change things.

Monday, October 21, 2019

More Maths in Graphics

A while ago all the CoL teachers were asked to reflect on where Maths happened in their classrooms.
My blog post on this is here.
Over the last week, my intermediate classes have been looking at networks. Making 3D shapes out of flat sheets. Link to information on my new class site.
They were given some nice easy grid paper and we made a start making cubes, cuboids and pyramids.

We used grid paper so they could concentrate on the shape and form we were making rather than doing too many skills at once. I have tried doing this activity with plain paper, rulers and pencil before and it was a total disaster as the measuring and drawing of the squares was too hard. With a grid paper, they can count the squares on the grid and use the lines there.

We had a conversation about where the spots on a dice are placed and they found out that the opposite sides of a dice add up to 7.


As they were doing this on Wednesday, their class teacher happened to be in the room and mentioned that they were doing probability in maths in class. PERFECT!
When they completed their dice we had a quick session throwing them and making a note of what number we got.
We then talked about why their results were not an equal 1 in 6 for each of the numbers. They came up with - 30 throws was not enough. The dice is not very heavy or accurate so it wasn't throwing or rolling like a dice normally does.

Not too bad for a graphics lesson! Maths in action!

Thursday, September 26, 2019

First go with Workspace

Other teachers at the college have been using Workspace from Hapara for ages. I haven't. I have been to PD on how to use it. Forgotten the PD. Generally avoided the whole thing.
Recently, we got the message through that we could start to use workspace with our intermediate students. Now this made me perk my ears up as I have been keeping track of the intermediate work by them linking their documents onto a shared spreadsheet. This had positives and negatives, but the main negatives for me were the nagging to get them to link up their work and the fact that they could all fiddle about with each other's links on the spreadsheet. The idea of using Workspace to be able to have access to all their work in one place was a definite bonus for me.  (as Tech teachers at the college, we can't see the student work on Dashboard as they are not "our class's" )
Having a go with Workspace with the intermediate classes was a good plan for me in other ways too. It means I can practice with them before I try it with my college students next year ( a kind of no pressure, no judgement environment as we are all learning how to do it together ), and I can use it next year to keep track of my senior students work as this has been a major issue with me this year.

I have set up a Workspace for my Wednesday and Thursday intermediate classes and we had our first "play" this week. ( thank you to the teachers of these classes as they had to put the students into the groups on my workspace for me)

Link to workspace here


So far, we have filled in two templates from the workspace to see how to go through the process.
It went quite smoothly. The problems came from me not the students (no surprises there). They were calling "I have submitted!" and I was getting totally over excited to see the work come through on the activity summary tab.

I have embedded the workspace into the new class site I have started for next year and I have started putting together workspaces for the Year 11 and 12 students for the first projects that they do when they come back in the new year.

Next steps - sit with a member of staff who has been using workspaces for a while and bend their ears with the list of questions I have got after our first play this week, with assessment and marking being top of the list.
Learning... learning.

Thursday, July 4, 2019

Learning through Challenge

My Intermediate and Junior classes are all involved in projects which will require some 3D printing done. To do this, they have to learn how to use Tinkercad.
I have discovered that the students enjoy learning the key skills they need in order to be able to do their design work if we do challenges. This is the same for the Year 7 students up to Year 10's.

This week, my Intermediates have been doing some skills challenges ready for design work when we come back after the holidays.


The first skill I wanted them to get was overlapping shapes, using holes and grouping.
So the challenge was to make a moon shaped pendent from 3 cylinders.


The next one was a combined challenge. Joining a square and 2 cylinders together, lining them up with the align tool.
Making the same shape as a hole through the first one.
Using workplanes to put their initials on the side of the whole thing.


I did these two challenges first on the board while they watched. They then did them with no help form me.

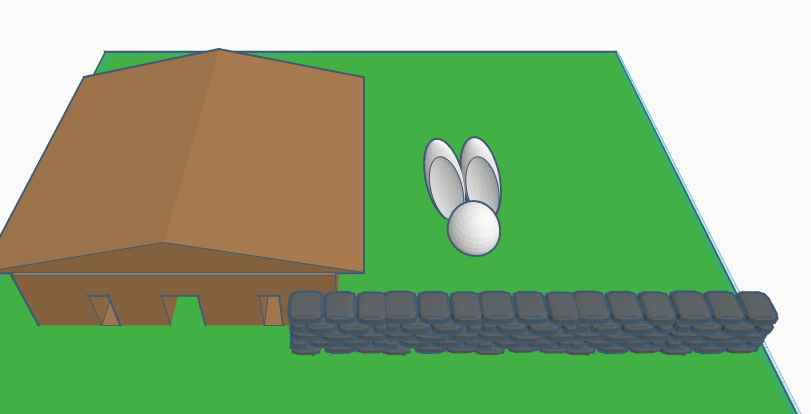
The last challenge was just a list of instructions on the board that they had to follow.

  • A house with a roof
  • A door that goes into the house
  • Two windows
  • A green base underneath as grass
  • Two trees
The fabulous conversations going on while they did this last one were great. They were helping each other, explaining how to do the skills, moving round and showing each other how do do elements of the work. They were all totally focussed.

I asked them to take some screenshots. Here are some of their creations. I love the extras they started putting in.


Wednesday, June 12, 2019

Design Talking with Intermediates

Today with my Intermediate Technology class, I decided to approach the start of the designing process in a different way.
We are going to design toys and games that make you think and the first activity that we did was to look at existing products to see what you could buy at the moment. Example blog post here showing what we did. ( I am putting everything we do in the Y9 and Intermediate classes on tis sample blog so they can refer to it to keep them on track and to catch up if they need to - blog post here )

I put them into pairs today and we put a list on the board of games that they play on paper
hangman, noughts and crosses, connect the dots, pictionary and battleships.
Each team had to choose a couple of them and spend some time playing them together.
There was lots of giggling, checking for things online and shouts of "i won"!
I then asked them to have a discussion with each other and come up with ways to make the games they have just played 3D. The ideas had to be able to be played with physical pieces that you move around and not drawn on paper. they could make notes and draw as they talked.


I loved walking round and listening to them. They were so focussed with the task they were asked to do. As a graphics teacher, I LOVED the ideas being drawn, talked about, scribbled out, changed, argued over. laughed about ... They were not bothered about being fussy over their paper work, it was all about the idea and working it out. This is EXACTLY what designing is supposed to be about. Where do they start to get so fussy that every sheet of work has to be perfect? My seniors drive me crazy over this, to the point where I have to physically restrain them from tearing pages from their sketchbooks! How can I encourage my seniors to be more like these teams this morning? Totally focussed on the ideas and not overthinking everything and stressing. We can clean up drawing styles and skills later.

We then sat together round the front table and shared ideas.
I wrote these ideas up on the board and asked questions to get them to think further.


It was a very productive session doing design work as teams. 

Questions for me ....

How can I build more team work into the design process
How can I get my senior students to work like these teams today? 

If you have any ideas while reading this I would really welcome some feedback in the comments.

Thursday, August 23, 2018

Literacy Activity with Year 7 and Year 8

With my intermediate Technology class today, I wanted to start off the lesson doing a short literacy activity where we look at the difference between 2D and 3D shapes and forms. We would also be looking at what various geometric shapes and forms are called.

We had a whole class discussion to start with where we were talking about what different things were called.

  • A square is 2D and a cube is 3D
  • A circle is 2D and a cylinder and a sphere are both 3D
  • A triangle is 2D and a pyramid and a cone are both 3D
  • a rectangle is 2D and a cuboid is 3D


The students were good at coming up with these words themselves. I wasn't telling them as we had Google images open in front of each student so they could research as we were talking.

This is my very messy board as we were talking.


We then talked about what everyday things that they knew that were the same shape and the same form of the things we were talking about.
I then wanted them to find some pictures of these shape, forms and things to illustrate a table on a Google drawing.


Here are some examples of the work produced by students today.
They were enjoying doing this so much we over ran my plan for the lesson quite a lot!!