Showing posts with label 3D printing. Show all posts

Monday, May 8, 2023

3D Printed Cookie Cutters

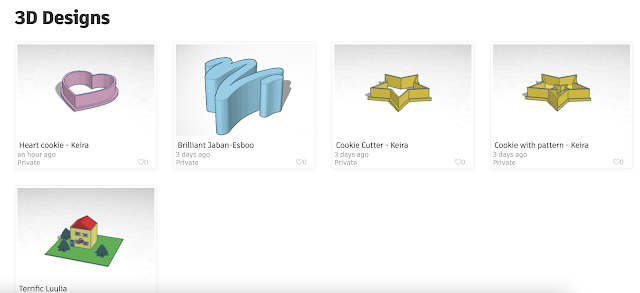
My Year 7 class this tech rotation are having a go with Tinkercad to design and make some cookie cutters that we can use to make some sugar cookies in the kitchen.

They are not my class at the college, they come from a local intermediate for their Technology lessons. Luckily on Tinkercad, you can make classes so it is easy for them them to get into the class and start work. 


It also makes it easy for me as the teacher to see the work they have been doing as I have access to it on the dashboard.

I had set the work up onto my class site so I could include examples, information and videos.

Link to class site


I have made some example cookie cutters for the students to see the process and we worked through the first one as a class.


We worked through the first, basic design together last Friday so I thought I would print out those ones for them before they come back this Friday to try the more complex ones. We will then make the cookies with them on Friday next week.


Friday, May 20, 2022

PD - Week 1 and 2 - OMG Tech PLD: 3D printing, Lasercutting and CNC machining

 We have had 2 weeks of PD from OMG Tech so far.

On week 1,  we looked at using Fusion 360. We looked at the basics and Krishna showed us how to produce a simple shape. A great tutorial to use is this one from Product Design Online. I worked my way through this tutorial after this first session and it takes you step by step through for a complete beginner.


We then went through slicing the design on Prusa Slicer so that it was ready to send G code to the 3D printer.


This came out really well when I printed it. We printed it fast so we could see it quickly but the quality was not bad.
Points to note when Krishna helped me to set up the 3D printer properly. 
  • A really clean base plate - he cleaned it with hot soapy water and dried it
  • Use cotton tissue to clean the hot print nozzle as the extra plastic stuck on there will come off on the tissue.
  • Print the first few layers slower to ensure good adhesion to the base plate.


I really want a way for the students to be able to create an orthographic drawing digitally so that we can use that method when the new DVC standards come into affect. I had a go at making this design into an orthographic today. I was happy with how easy it was to do, the detail you can add and how it links directly to the 3D product that has been designed and drawn. Will Fusion 360 be efficient for this? I am not sure. I need to use it a lot more myself first before I make a decision.


Here are my written notes from the sessions.

Useful links
Thomas Sanladerer - YouTube channel
CNC Kitchen - YouTube Channel


Thursday, July 4, 2019

Learning through Challenge

My Intermediate and Junior classes are all involved in projects which will require some 3D printing done. To do this, they have to learn how to use Tinkercad.
I have discovered that the students enjoy learning the key skills they need in order to be able to do their design work if we do challenges. This is the same for the Year 7 students up to Year 10's.

This week, my Intermediates have been doing some skills challenges ready for design work when we come back after the holidays.


The first skill I wanted them to get was overlapping shapes, using holes and grouping.
So the challenge was to make a moon shaped pendent from 3 cylinders.


The next one was a combined challenge. Joining a square and 2 cylinders together, lining them up with the align tool.
Making the same shape as a hole through the first one.
Using workplanes to put their initials on the side of the whole thing.


I did these two challenges first on the board while they watched. They then did them with no help form me.

The last challenge was just a list of instructions on the board that they had to follow.

  • A house with a roof
  • A door that goes into the house
  • Two windows
  • A green base underneath as grass
  • Two trees
The fabulous conversations going on while they did this last one were great. They were helping each other, explaining how to do the skills, moving round and showing each other how do do elements of the work. They were all totally focussed.

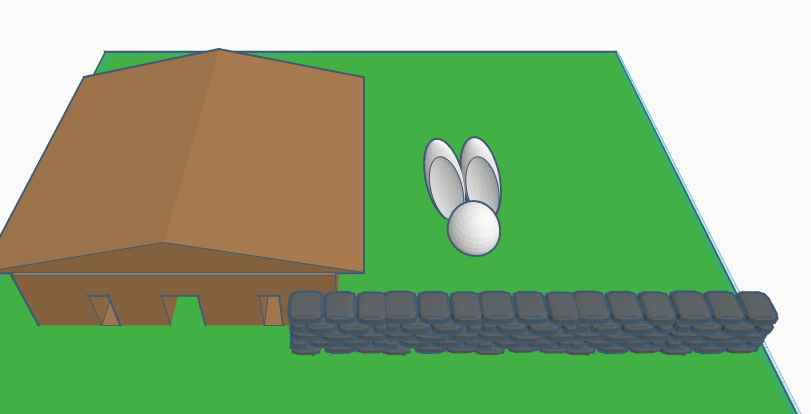
I asked them to take some screenshots. Here are some of their creations. I love the extras they started putting in.


Thursday, June 28, 2018

ISTE 2018 - Day 5 - Employ Design Thinking with 3D Printing While Learning to Code

There is a skills gap where people need work and the industry needs people.
They run toolkit’s through design thinking not through apps etc.
#isteliustem
Find problems and then solve them with the design thinking process.
People focused - societal and cultural problems
Give students a scenario and they have to work out the problem themselves.
Virtual crash course
dschool.stanford.edu/dgift/
You need a beginners mind in the design thinking process.
1. The interview
2. Dig deeper - what are your questions - practical and social - don’t come with questions with answers already in mind. This questioning part is critical - how can we ask the right questions
3. Capture findings - fast ideas - cover the tables with roll paper / big paper so students can just write and draw on every surface while they are thinking.

Rapid prototyping is a game changer with this process.
It alloCws anyone with access to a printer to become a prototyper.

Cad competency needs building so this process is smooth and there is not a jolt / stop / problem in the middle.
Build cad skills based on something that exists not while having to think about designing as well to start with.
Reverse engineering what you see - really good for skills building
BlocksCAD - coding based design app for 3D printing.


On Tinkercad, click on edit grid and change the workplace size to be the size of the bed in the 3D printer.
scribble tool is freehand.

Blockcad3d.com
Just start to build - don’t have to log in
Do a snowman build to get skills.

Gcode
Tells you what the print is doing step by step.
The slicer gets its time and amount of plastic values from the gcode.

Tuesday, June 20, 2017

What happens when students choose their projects?

While I was working with my Level 2 boys today, the chat got round to project / topic choice.
I was asked "can we design shoes?"
So my reply to the Level 2 (Year 12 ) boys was "do you want to design shoes instead of shelters in Year 13?" They already know the Level 3 main project is a portable shelter as they see it in the lesson (my class is a mixed level class)

Their reaction was quite excited, which then got even more so when I told them of the 3D printed shoes that I had seen online recently. I have put this idea past my other class of Year 12 students and they seem keen too. So it looks like I am rewriting the Level 3 Product Design project, which is all good. I would rather they did something they were keen on as this is a big project and takes up a fair chunk of time on the course. It is also god advertising for me, getting them interested for Level 3 while they are still in Year 12!!
I sent student R these links today as he was the one that started all this. Hope it will blow his mind as he was "really??...we can 3D print shoes???" today.

Link 1
Link 2
Link 3

So their job now is to work out what materials we need to 3D print something flexible and if it needs a different printer. We need to know that before the budgets are due in at the end of the year.


Wednesday, October 21, 2015

Tinkercad Toolkit ...

I held one of the cluster toolkits for teachers this afternoon.
Our focus was using TinkerCad for 3D printing.

Here is the presentation I prepared with the resources in it.


We were learning basic skills and drawing a name tag on Tinkercad, and as I knew we would not have time to print these in the session, I made everyone a take away present.
I printed them in 3 different colours so they could choose :D