Showing posts with label coding. Show all posts

Tuesday, August 2, 2022

PD - Beyond the Code


 https://events.humanitix.com/ytech-beyond-the-code


Edwina

You don't need maths and science for every tech role. Tech is part of every job and career.

@ytechnz


Keynote - Dan Te Whenua Walker - Microsoft


Indigenous at Microsoft

A platform to do good in the community.

<2% M and P in tech industry

Cultural tax / low trust / lack of role models

Indigenous @microsoft launched august 2020

aka.ms/indigenous

#10kwahine

Tupu Toa - skills training

Maori AI and neural machine learning

Microsoft translator - creating access to the language for more people

Holo lens - builds the space around you in VR

Tupu.nz

Maori minecraft universe

Wrapped xbox

id@xbox - game developers

Xbox cloud gaming - play on other devices


Subash Chander K - Ormiston Junior College

Slido - 20207

Youtube - infinityplusone

Twitter - @elsubash


Flipped learning - creating videos for the students to access their learning

Project AA - sphero robots

Live streaming resulted in lots of feedback and questions from the students. Much more than the online lessons.

Can education be on demand?

When, as adults we need to know something or learn how to do something, we go online. Watch a video / read some info. We learn what to do when we need to know it.

Can you sometimes be guilty of forcing “the fancy stuff” on the kids where they want a more basic approach.

Passion projects can ignite a different side to the kids interests.

Adobe creative educator

Teachers need to be -

Master of adaptability, how fast cab you change to meet the needs of the time?


30 Women And Gender Diverse Folks Tell Us How They Got Into Tech? (School Student Friendly)


Whitney Steel - Xero

Not all jobs in tech need tech experience. Don't need coding or science and maths

@whitneysee - -tictok


Tech - be aware of what is the here and now - to be disruptive , you have to know what is now in order to change it. Keeping an eye on the future and what is changing in order to be able to do this.


Thursday, July 28, 2022

Starting to code with Python

 My Year 8 coding class came back to me today after their two week break. Last term we were working with the mBots, looking and binary and using the sensors on the mBot. Link to the mBot planning on my class site.

Today, we started playing with the Microbits - link to planning. The online app for using the microbits is great, as there is a simulator to test the code before you put it onto the actual microbit. You can code in either the blocks or python / java script. It takes you through activities with tutorials, step by step, to build your skills and confidence.

What we did today was to start with the block coding, as they were comfortable with that as they have done a lot of it with the mBots. We then did the same activities using Python and put screen shots of both side by side so they can compare and see what each part means. This was good as they could then change parts of one and see what what happened with the other. Being able to click back and forth between blocks and Python on the screen was really useful for this today. They could also see what rules were needed when writing the simple lines of code (like indenting).

This was all written up on a presentation by the students with examples of what they have been looking at and changing in the code.

Link to my example


Sunday, September 19, 2021

Lego Algorithms

 My Year 7 coding class are learning what algorithms are. As we are on lockdown at the moment, I am thinking of things they can get stuck into at home.

As I am busy building Lego at the moment, following the instructions, I thought we could have a go at making our own Lego instructions for someone else to follow.

Here is where the work is set up on my class site.

They can choose what ever they like to build and break it down into what steps are needed to get it across clearly to someone else.

I have included a video for them so they can use remove.bg to get rid of the backgrounds in the photographs of their lego pieces.


Here is my example step by step to make yellow boy.


Friday, September 17, 2021

Using Wordwall for Learning New Words

Today, Mr Cunard in our PE department played a game with use using the flip grip option on Wordwall. He then shared the link to the website. When I checked it out I found there was a load of options and templates to choose from.


I decided to try the Match Up template to have a go at a word game for my Y7 and Y8 coding classes.
It was easy to put the words and definitions.


You can send the link to students via their email, so they can play the game in a browser window or you can grab the embed code and put it onto your class website, which is what I've had a go at here.

I made a video to explain.

Wednesday, September 8, 2021

Prepping to Learn about Algorithms

 My two new intermediate coding classes have got to learn what an algorithm is. They have to know and show what this is both in a non digital and digital way.

Link to algorithms page on class site


I have started with them finding three things that they know about and breaking them down into input, algorithm, output. I have made an example for them to look at and made an explanation video for them to watch after the lesson to remind themselves what to do. I also found a good explanation video on YouTube.

The second activity on this page is to be done in their own time while we are in lockdown. They have to write instructions for someone else to follow. They then have to analyse how it went and write up any changes they would make to improve their instruction (debugging).

I have written these activities to line up with the tracking document linked to the Progress Outcomes. Blog post here about this tracking sheet These activities are linked directly to Progress Outcome 1.

At the top of the site page, I have included some extra reading for the students and extra activities for them to try.


Monday, August 23, 2021

Online Activity - Coding Challenge a Day

 This is for my Y7 and Year 8 coding classes. I have set them up on my class site so they can work through a colour set in a week if they want, pick and choose from the sets or basically do any they want.

Link to class site

Here are the individual sets

Link to Red Google Drawing


Sunday, August 8, 2021

Self Tracking for Intermediate Tech Coding Planning

 My inquiry this year is looking at how I can get students to be self motivating in their project work. Part of that problem is knowing where they are within a project and knowing where they are within the assessment process.

For a while now, I have been making standard breakdown documents for my students. 

I am not sure if my students use these to be honest but they have been really useful for me to ensure that I am covering work that will give them access to all levels of achievement. I have recently discovered that you can do a checklist option on a doc which you can tick and it crosses out in a very satisfying "i have done that" kind of way. I think I will redo these sheets to include these to see if I can get my students to use them to track themselves. We already use a class shared spreadsheet for tracking. 

Recently, we had a department moderation session where we were looking at the planning and marking of junior and intermediate projects.  Mrs Anderson shared the sheet that she uses to track the evidence for computational thinking. (I wont share hers here as it has student work on it with names etc). 
A copy of this was made and feedback from the moderation process was put under the grid of descriptors as the moderation went along. This was very useful, having lots of eyes of fellow tech teachers on my planning and seeing where the gaps are. I then used this to highlight in yellow where I needed to add things.
I then cleaned this up to be a version that is useful to me to make sure that I cover everything that is needed on my site for that mBot project.

I put this onto my class site in the assessment area for this mBot coding project but realised that it is not particularly useful for the students as it uses the language straight from the progress outcomes.
It was when I was converting this document to the more student friendly version that I found the checklist option on docs. I will use this version with my two coding classes in the next tech rotation to see if it is any good and do any changes needed to make it better.


My hope is that we can all make a copy of this doc at the start of the rotation, share it with the teacher and use it to link up the evidence documents as they work through them from the class site. This will give them a very visual indication of where they are both in the project and the assessment.


Friday, June 25, 2021

Coding on the Microbits - Rock Paper Scissors Flowcharts.

 My Year 8 class today were coding with the Microbits. To continue our work on using flowcharts to plan our coding, we wrote the algorithm for playing Rock Paper Scissors and then designed a flowchart to show how the coding flows through. I know this is a bit back to front at the moment but I want them to get used to seeing the flowcharts and how they compare to the blocks on the coding.

Link to work on the class site.

Here are a few of the students blog posts about what we did today

Juel

Fau

Lilly


Thursday, June 24, 2021

Using flowcharts to prep for coding - Part 2

 Last week, my intermediate class were looking at using flowcharts to plan coding. They planned the small sections of how the mBot has to behave to follow the black line. Blog post here

Today, we put together all the parts from the previous couple of weeks. The binary was used to code the mBots and the flowchart and code was all put together to get the final outcome.

The students then had a great time racing the mBots round the course, changing the speed variables and adding lights at every direction change.

Link to Google Drawing here


Thursday, June 17, 2021

Using flowcharts to prep for coding

 My intermediate class are coding mBot robots. To get them into it, we have been just kind of launching ourselves in and doing "stuff".

To prepare for the "Follow the line" task (link to task on the class site here) we have been preparing so they know why the code is like it is and why the mBot is behaving as it is. Last week we looked at binary. We did an introduction to what binary is and some whole class activities and then we played some games so they got the hang of it themselves. (link to work here

This week we looked at flowcharts and how they help you to plan a sequence of events that have to happen. Link to work on class site here. We went through the symbols and where to find them on Google Drawings then went through the "Do you take sugar" example. The class then had a go with the "Socks" activity themselves and we looked at using loops with the alarm clock example. 

We then started to apply it to the following the black line main activity that they have to do. We went through the sequence that had to happen verbally first so they understood which way the mBot had to go in the four different circumstances. 

  • both sensors on the black line, 
  • the left sensor on the black the the right sensor on the white, t
  • the right sensor on the black the the left sensor on the white, 
  • both sensors on the white. 

We did the first two events together, then they had to do they second two themselves. It came together quite well as we were combining the binary work we had done, the flow charts and seeing where it all linked to the coding blocks. Seeing where the flowchart links directly to the coding blocks is good.

Here is my worked example, which I did on a google drawing. Maybe I should have done it on a presentation so each event could have its own page and be clearer to understand. Link to drawing here.

Next week, I want them to combine it all together and upload it to the nMot to see if it works. They will then understand why the numbers on the inputs have to be 0,1,2 or 3 and understand the flow of the algorithm.

Wednesday, June 2, 2021

Cluster Create Workshop - Rock Paper Scissors with Microbits


For our cluster create staff meeting this term, we all got together at Stonefields School and it was the students this time who were doing the presenting and working with the teachers to show them new things.

My team was some of my lovely Year 8 class from Glenbrae School. We have been doing coding for their Tech rotation so they taught their class of teachers how to code the Microbit to play Rock, Paper, Scissors.

Here is the presentation that they worked through and spoke to.


They presented really well and helped their "class" really well too. Here are a few shots showing them at work.

Sunday, May 23, 2021

Maths in Y8 Coding

 This week was the last week of the Technology rotation for my Year 8 coding class. I have taught them coding since they were in year 7 and we have had a lot of fun.

For the last couple of weeks we have been playing with the Microbits. We have also been playing with mBots and Drones over the last couple of years. I am a Graphics teacher and I have only been teaching coding for the last two years, so I am learning as i am going with the students. Here is my planning on my class site.

This week, we made the Microbit into a step counter. They had to code their microbit to count each time it was shaken and show that number on the LED's. They then had to stuff it down their sock and go outside and test it.

They had to analyse if the step counter was counting one leg or just the one. We then discussed what differences to make if they thought it was just counting one leg.


The next step was to get the Microbit to measure how far they had walked. The students measured their stride, then changed the number being shown on the Microbit to that stride length multiplied by the number of steps.


To test this, the students went into the carpark with rulers and chalk and marked out a 3 meter line so they could walk down that and see if the Microbit was saying the same amount.

Here they are out in the carpark doing the testing. It was pink shirt day on this day which is why they are looking really pink.


Here is the class and me looking very pink.


Friday, March 12, 2021

Robotics - Learning to fix the mBots

 My Friday morning robotics class are now in Year 8. I had them in the third Technology rotation last year when they were in Year 7, so I know they are super keen robot coders.

This year, I want them to be able to debug their own problems a lot more so the first step today was to understand how the mBots were put together. The most common physical problems come from loose nuts and bolts on the motors, loose wheels or the connections in the wrong places. 

Each student had an mBot and a screw driver tool and we set to taking them apart. I explained how each part was carefully removed and they worked until the robot body was empty and all the pieces were separated on the table. The challenge was to then put it all back together and test it with a simple algorithm to check it can move froward, turn left, move backwards and turn right.

They were surprised when I refused to help them or give any tips on putting the mBot pieces back together and they weren't allowed to sneak a peak at the assembled on at the front of the room. They were allowed to help each other though and there was a lot of that happening. 

There was a LOT of quiet concentration. That only broke really in the second half of the lesson when frustrated noises were starting as the nuts holding the motors in place are really small and fiddly. 

Then they had to load up the coding for the test run and make sure they had put it together correctly.

It was a very successful exercise today and I have high hopes of them now being able to fix their own physical problems with the mBots this year as we work through our coding tasks. There was only 4 mBots at the end that were not quite put together again (job for me!)


Friday, June 26, 2020

Coding Matariki Stars with mBots

This week we have been celebrating Matariki and we have had lots of activities and competitions. Many of these activities involved the theme of stars so  decided to continue this theme with my Year 8 class this morning. We have been coding our mBots to move, make noises, make lights come on, react to sensors. Today, we were coding our mBots to move in a star pattern.
First of all, we drew stars on paper without taking our pencils off the page.
Then we looked at what we would need in mBlock to code the star. They already know the repeat block.
These were the blocks they needed to use. The tricky part was setting the variables to the correct values so the mBot will turn the correct amount on the points of the stars.


The students showed fabulous resilience today and went about the task of trial and error really happily.
We went out into the carpark about half way through. We drew big stars on the ground and walked the path so they could feel the actions that the mBot needed to take.
When they were testing the movement of the mBots in the class, we decided to tape a board marker pen to the front so it could draw on the table top. The students could then see the motion clearer and see what changes needed to be made.


The students have been writing this up on their blogs and explain it much better than me.

Florence
Giovani
Karlos
Sakshi
Ellenora
Akuhata


Friday, March 20, 2020

Binary with Year 7

My Year 7 coding class are learning to make their mBots become autonomous cars. Part of that is to use the infra red sensor underneath the mBot to sense and follow a black line. To do this, the students need to understand a little about binary.

We started today talking about how they counted.
They all started counting for me out loud.
Then I asked them to add two single digit numbers together in their heads. Easy peasy. Answers were shouted out. Then I asked them to add 9 and 23. This took a bit longer in the head, and fingers were twiddled and counted.

Then I asked them to addf 329 and 73 in their heads. Some got there.
This was then written as sum on the board and they were all comfortable again.
I asked them how we know where to put the 73 under the 329 as they are different widths / numbers of digits. They then told me about units, tens and hundreds. Their teacher at intermediate will be proud of them.


After they had mentioned the units, tens and hundreds, we talked about how we count.
The name was DECIMAL as it is based on 10's. Every step to the left is 10 times bigger. We put numbers in them place slots tos ay how many of them there are of each.


I then introduced a new counting method. BINARY.
I used the class light switch as an example. How many switch places are there? 2. The switch can be on or off. The lights can be on or off. There are no threes or fours or others numbers. It is yeas or no.

BINARY counts in multiples of 2. I put the columns up to show them the difference. Each step to the left is multiplied by two this time. We did a few numbers together till they got it. 


Binary Games

The first game we played was in the car park outside. The students put themselves into teams of four for the four columns we had been using in our binary examples. They each had two pieces of paper. One with a 1 on it and one with a 0 on it.
I wrote down numbers on a card and held it up. The teams had to shuffle themselves with their paper to be sowing the correct value in binary.


Here is a slightly chaotic video ...


When we went back into the classroom, I had some binary games ready on my class site for them to have a go at.
Link to class site where the binary games are.

I thought that they might not appreciate this lesson as we did not use the mBots today, so they go no direct coding done. They did play some of the coding games that I have on my site too, but did not code the mBots.
Next week I plan to "test" their binary knowledge to see if what we did today was ok. This "test" will be in the form of an online quiz / game so they don't feel tested.
I hope this was enough for them to understand why we have to use a bit of binary when we code our rmBots to react to the black line.

Friday, February 14, 2020

Coding with Year 7 - Lesson 1

I have been preparing for my coding lessons with my new Year 7 class this year. I wrote a blog post here about how i was going to be looking at Algorithms.

Our first lesson was today, and after  we all got on my new website, found the work and I had given them a brief description of what an algorithm is, we all went into the carpark to try some out.


  • They got into small groups and decided who was the programmer and who were the robots.
  • Instruction 1 - The programmer had to give their robots one instruction and watch them do it then give them another and so on.
  • Instruction 2 - The same as one but they had to give two instructions.
  • Instruction 3 - They have to give 3 instructions bit include more details like direction and how long or how many.
  • Instruction 4 - They have to give 5 instructions, include details, one has to be sound, one movement in a line, one a dance movement
  • The programmer had to give the "algorithms" and the robots had to listen and remember a sequence of instructions.
We then got on with the rest of the prepared lesson as it is on the class site. We didn't get as far as I had planned as we spent a little more time playing in the carpark than I intended.

Things to note for next time :-
Check the mBots are charged - we had a couple of flat ones today
Check the boxes all have 6 in them - there was one with 3 today
The link to a copy of the presentation worked well and saved time.
They all got online fast and found the site and work very efficiently.


Wednesday, February 12, 2020

Preparing for my first Year 7 Coding Lesson

I have my first coding lesson with a year 7 class on Friday.
I have had some experience of teaching coding last year to a Year 8 class last year where we were making an mBot robot follow a black line using sensors.
Blog post 1     Blog post 2
With this, I was using the planning of Mr Dunn as he had been doing this with other Year 7 and 8 classes.
This is my first year planning for it myself.

To start with, I am going to talk to my Year 7 group about what an ALGORITHM is. We will relate it to real life things that they know about and my example will be knitting.

Input - the wool, the algorithm - the knitting pattern, output - a jumper.

This table is what we will fill in with everyday examples. Link to Google Drawing here.


Then we will move on to having a bit of a play with the mBots and a first go at using the mBlock software.
This is the link to my site where I have put all of the activities for this.
The activities are listed on the drop down under Y7 and Y8, coding.


This is the presentation with the first coding activity for the mBot. We are making coloured lights.
I have set it up so it is very visual (I am a graphics / design teacher!!) and so they have to put evidence of their work and thinking as we go.
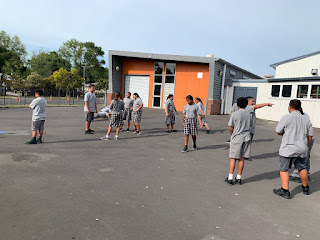
This one is very simple in order to get them used to using the mBot, the online programme and having to evidence their work with screenshots, videos and analysis of what was happening.
This needs to get more complex as they get experience so they can start deeper analysis of what they did, what happened, what went wrong and what they did to change things.

Thursday, December 5, 2019

Coding the Tamaki College mBot Christmas choir - Part 2

Last week the students had a go at team coding a choir. Blog post here.
To make sure we are all on the same code today, I had a go my self at getting two mBots to sing in harmony.

Whaea Trina, one of the Tamaki College music teachers worked out the harmony for me from the original melody.


This week, I sent the code to the students in this format. Link to file here.


They then had to work as a team to work out who was going to be main melody and who was going to be harmony. 


So after adding some suitable coloured lighting effects and then putting the code on extra mBots so they could place them in a Christmas Tree pattern, here is the finished choir.


Thursday, November 28, 2019

Coding the Tamaki College mBot Christmas choir - Part 1

Today with my intermediate class who are doing coding, I wanted to do a quick "warm up" do now. This plan failed immediately and it turned into a whole double session on this activity.
We were coding our mBots to sing Jingle bells. I had found an easy version online with no flats or sharps so it could be a "quick activity". Well ... no...

We ended up trying to all code the same  so that we could all push the buttons on the mBots together and have an mBot choir. This then morphed into planning on going into the class next door to carol sing with the mBot choir.

Through no fault of their own, we had technical issues ( hey ho, when don't you when working with tech ), we did not get finished and they were not sounding as alike as was needed for this "concert".
We saved our work with the plan to carol sing at the start of next week.

When they had gone, I had an idea. I have given the music to one of our music teachers and asked them to write a harmony part and plan to get half the class on the original code and half on the harmony part.

I have written the code for the basic part and plan to give it to the students for the start of next week along with the harmony part. We can then get the whole class in the choir working together.

Part two of this blog post will be next week when we give this a try. This could be great or hideous. Either way will be fun.


Thursday, November 21, 2019

Autonomous Car - mBlock Coding Explanation

I have been coding my mbot to follow a black line and to stop if something is put in front of it.
Here is all of my code.


Here is a video of my code working (please excuse it's sideways viewpoint)


Here is an explanation  of how my code works.


At the top of my code there is the start up block that lets my mbot know there is a line of code coming.
I then have a wait control block that is connected to a sensor block that is the button on the mbot.
I have added this so that the mbot will not start the coded actions as soon as it is turned on. I can wait till im ready and press the button for it to start.


The next thing is an operator block and a sensor block. This is saying to check if there is anything less than 10cm away from the front ultrasonic sensor.


I then used an "if, then, else" control block.
I used this because it gives the chance to put two different options of actions for the mbot to do depending on a condition.


The ultra sonic block is placed in the if.
This is saying that if something is less than 10 cm away from the ultrasonic sensor, the mbot does the actions in the "then" section.

These actions are:-

  • The mbot will stop, so it doesn't run the thing in front of it over
  • It will show red light to show it is stopping
  • It will make a noise as a warning


The movement around the black line is put into the "else" section of the main control block. This is because it is the other thing the mbot has to do if there is nothing in front of it.

These sections are all put into "if, then" control blocks. This is because there needs to be a condition happening for the action to happen. If that condition is not happening then it will move onto the next code block.


There will be 4 of these and they will be based around this binary information.

Left Right21
Black Black000
Black White011
White Black102
White White113

This works like this ...


The code for this section, with all 4 sections, looks like this, where all of these 4 possibilities are in their own "if, then" control blocks.


While it is following the line, a green light is showing so this is the first thing inside the else section.


All of these "if, then, else" and "if, then" blocks are wrapped by one forever around the outside. This is because I want the mbot to continue to check for these conditions all the time. If the forever was not there it would do it all once then stop.