Tuesday, September 26, 2017

Manaiakalani Google Class OnAir Lesson 14 - Design Portfolios

See the whole Class OnAir team here


Direct Instruction

The students are gathered round the front of the class room very briefly for instruction. They are to use the site template that they started at the beginning of the year to put all of their project work on.
Work that is online needs to be put into their subject folder and this whole folder made public. This will ensure everything embedded on their site from this folder will be able to be viewed by anyone.
The students are to ensure that their sketch book work has been scanned and uploaded to the class communities so that it is available to be included on their sites.
Anyone who does not have a portfolio site is to sort out time with the teacher in order for that to be sorted out as soon as possible.


This is the whole class chat about using the Google Sites that they made at the start of the year using a template supplied by the teacher.


This is the direct instruction to one Year 11 student who has not set up their Google Site yet.


This shows some of the students working on their portfolio sites and a couple of them talking about putting the site together.


Lesson Topic :- Portfolio Sites
Year Group :-  Year 11, 12 and 13
Learning Outcome
The students will have presented all of their up to date project work on their portfolio site (Google Site)

Success Criteria
Using SOLO


Uni
structural
Multi
structural
Relational
Extended abstract
Students will have identified all of their online work and will have filed it in the appropriate folder in their drive.
Students will have scanned their sketchbooks and will combine these scans with their online work in their folder.
Students will embed their online documents and their scanned designed work onto their Google Site in an order that makes sense so that the project flows and each part relates to the next in sequence.
Students will use their Google Site to present all of their project work together to create an online portfolio.
They will use presentation skills to create an online portfolio that shows them and their work in a good light.

Links with the New Zealand Curriculum
Level 1,2 and 3
The students put all of their project work over the year into a portfolio.
This used to be all on paper and posted to Wellington in November. It is now a combination of a portfolio site in the form of a Google Site and their sketch books with their original drawings in. The Google site has all of the online documents that the students have completed for their research. It also has scans and photographs of
The link to the online portfolio and their sketchbook are sent away together and the external components of the projects are marked.
  • Thinking - making sure they have everything sorted out ready to include on the site. Use the class site as a guide to know what they need to have.
  • Using language, symbols, and texts - visually presenting their work in the correct order on a Google Site.
  • Managing self - using the RISE values when doing this work on their own and staying on task.
  • Participating and contributing - helping others when stuck with how to put content on their site and with what understanding what work needs to go where.
  • Relating to others - responding to the ideas and help from others in a positive way.

Prior knowledge
Most of the students made their Google Site at the start of the year by using the template supplied by the teacher.
They have completed most of their project work ready to go onto the sites.
They have used Google Sites before and are aware of how to embed things onto the pages.
Lesson Sequence


Session Outline
The students will mostly be working at their own pace, online. They will be finding all of their work in their drive and adding it to their Google Site as an online portfolio.
Student Activity
Teacher Activity
  • The students will sit round the front table and listen together to the teacher outlining what to do and reminding them of what to put on their Google Site.
  • Remind students that we made Google Sites at the start of the year by using the supplied template made by the teacher.
  • Go over what needs to go where, what the headings and tables of contents on the pages mean and what they should be embedding.
  • Point out where online help is in the form of the portfolio help page on the class site - this is for when they forget how to embed items etc…
  • Scanning of drawn work in sketchbooks where needed.
  • Individual help and support where needed.
  • Help with students who don’t have a Google site yet.
  • Find all of their online work and make sure it is in the appropriate folder on their Google Drive.
  • Get their scanned work from the Google Plus Community.
  • Present all of their project work on their Google Site.
  • The students need to make the folder they have put their work into is public so that everything in it is public and able to be viewed by anyone viewing them on their site.
  • Make sure the Google Site is public.
  • Share the site on the class Google Plus Community
Resources

Google site templates
Scanner
Google Plus Communities Level 1, Level 2, Level 3
Next Steps
The students need to continue to add work to their portfolio site as they finish it to keep the sites up to date.
Reflection and Analysis

What went well.

Having the students find all of their online project work and make sure it is in their class folder was a good way of refreshing their memories on what they have completed over the project time.
They then had to make this folder public. This was very useful as it stops them having to remember to make each individual document public so that they are viewable when embedded on their sites.
Reminding the students at the start of this activity what to do was useful as although they all know how to “do” sites, it has been a while since we were last on them and it is not something they are doing every day, so they forget.

What still needs work.

There were students who started a little late into the year so had not made the portfolio site at the start of the year like the rest of the group. I had to sit with these students individually to go through what to do and how to do it.  It would have been better if
I had sat with them when they first joined the class, so they were ready to go with the sites when the work was done and ready.
I need to get the students to keep their sites up to date as they complete elements of work within the projects. This will then stop the need to do this in a big session at the end of projects. This is important as if the students do not come to class as often towards the end of term 3 and start of term 4 due to a variety of reasons, then their sites are up to date and ready to be sent away in November for external marking.

Student Work

Autymn - Level 1
Max - Level 2
Alex - Level 2

Class Google Plus Communities

Monday, September 25, 2017

Vocabulary Activity Planning for Jump Start

When our senior students leave next term, our Year 10 students start their new NCEA Level 1 courses. They get and early "Jump Start" for next year.
The first project that my NCEA Level 1 students do is AS91069 - Promote an organised body of design work to an audience using visual communication techniques. I have them do this by looking at the work of a selection of architects and then design a poster to promote that work, with the layout of the poster being in the style of the architect.
I have planned a basic overview of the course using the schools Unit Plan template. What I want to add into this now are activities based around literacy and vocabulary. I have written a blog post here about why my inquiry has made a move into the area of literacy. Part of my thinking and planning for literacy has involved me visiting the class of +Robyn Anderson , which I have written about here. I have used a number of ideas taken from this visit with my planning.

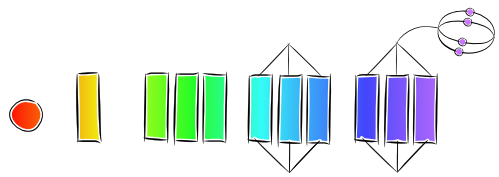
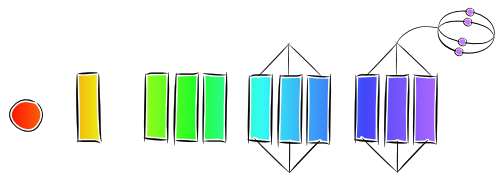
I will get the students to work in pairs - this will be the start of my using small group work to support their confidence. They will get a film poster and a set of 10 words. (in the yellow diagram above). I will not be giving them the meanings of the words and I want them to discuss between them in their pairs where they will stick the words on the poster (just by using blue tack).
I will then use a list created on Vocabulary.com to let the students research what the words mean. They will then get a chance to move the words around on the poster if they decide they need to after reading the meanings.
Green laminated cards will be available for the students to write meanings in their own words to go with the words.

I have purposefully made the initial words cards yellow and the meaning cards green to link to the colours on the SOLO Taxonomy posters in the class room.
Yellow for Unistructural / Labels.
Green for Multistructural / Describe.


All of the work that the students do for this activity will be put up on the class room walls for them to refer to afterwards so they can easily remind themselves of the first 10 words we have used to describe parts of a design.
I intend to keep adding vocabulary words to the wall as we use them to build a growing bank that they can refer to easily.

I intend to film this activity as part of my Manaiakalani Google Class OnAir work next term, so will be blogging about how it goes then.

I have put all of the resources for this activity in a folder on Google Drive. Link here.


Friday, September 22, 2017

SOLO Poster in Te Reo Māori

In all of our classrooms at Tāmaki College, there is this SOLO poster that I put together a while ago and printed lots of copies for everyone. Blog post here.


After a trip to schools in the South island last week, +Robyn Anderson gave me the words for Prestructural, Unistructural, Multistructural, Relational and Expended Abstract in Te Reo Māori today.
I thought it would be a good idea to completely redo this poster, so I needed more help with all the other words and phrases. With the help of Brent Dunn in the Tamaki College Te Reo Māori Department, I have redesigned the poster.
I have shared this with all the staff at school so they can use it if they want to, or maybe order one to be printed really big on the large format printer so they can display it in the classroom with the English / original version.


If you would like a copy of this poster without our school logo, then here it is ...


Friday, September 15, 2017

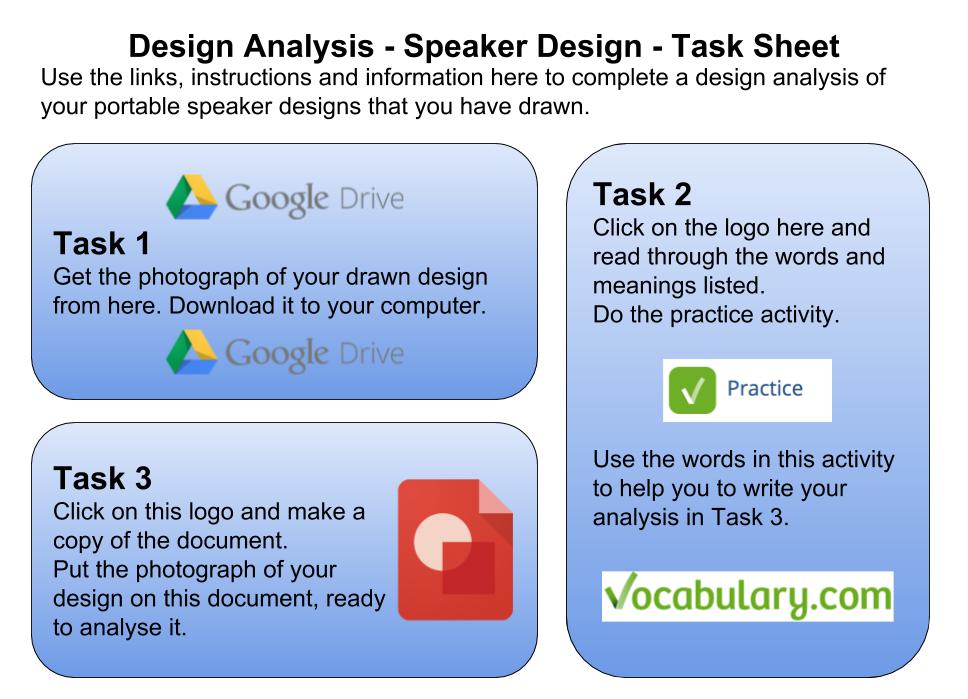
First go at making a HyperDoc ...

I have recently been reading The HyperDoc Handbook.
The main thing that caught my notice while reading this was :-

"We want our students to be creative, collaborative, critical thinkers and communicators —and then we ask them to sit quietly while we explain everything and tell them exactly how to do a task." from "The HyperDoc Handbook: Digital Lesson Design Using Google Apps" by Lisa Highfill, Kelly Hilton, Sarah Landis

This stuck with me as I am trying to build a course that supports a multi level / year group situation in my classroom. I want them to be able to know what to do and get on with it with constant teacher input.

I thought I would have my first attempt at making a hyperdoc with my Year 10 class.
I have decided to use Google Drawing to make it ( as it is my favourite Google App!!) and make quite big, chunky task "buttons" for the students to click on. I have kept it simple, to 3 tasks that can be completed in a lesson for our first try.
I will try this out on them next week when I see them and get some feedback from them about what they thought.
I am hoping to get the hang of this so I can use it for the Jump Start students in term 4.


Manaiakalani Google Class OnAir Lesson 13 - Design Analysis of own Design Work


See the whole Class OnAir team here


Direct Instruction

The students are round the front table very briefly so they can be reminded as a group about what we have covered in the design analysis exercises and they can see the relevance to the analysis that they need to do to their own designs now.
Stress is given to the main elements that are important in their analysis, especially the WHY of the design decisions that they have been making.
The students then get on with their individual work where one to one help and support is given where needed.

Here is the direct instruction given to the whole class where we remind ourselves of the work we have covered in the design analysis exercises and stress the important elements that need to be included in the design analysis of their own work.


This is some clips of various lessons where I am working one to one with the students on their individual design work.


Here are some of the students talking about their analysis work.


Detailed Lesson Plan


Lesson Topic :- Product Design Analysis Team Work
Year Group :-  Year 11, 12 and 13
Learning Outcome
The students will be able to analyse their own design ideas using the skills gained in the previous exercises.

Success Criteria
Using SOLO
These have not changed a great deal in the last few lessons as we are still doing design analysis which incorporates the same skills and levels in SOLO.
The focus of this work has been changing and the depth that we have been doing it has been increasing.
The focus is now on their own work so the success criteria is more specific now towards that.

Uni
structural
Multi
structural
Relational
Extended abstract
Students can identify the main parts of their own designs.
Students can describe and list the design elements, properties, how it will be used and materials used in a design.
Students can describe how materials have been combined together on their design ideas.
Students can explain and compare elements of their design ideas to show how they work together and the effects that they have.
Students can explain why materials have been chosen and the properties that they have to make them suitable for the job.
Students can evaluate their own work and reflect on where design decisions have been made and generalise on why they were made. They can imagine where improvements can be made and can evaluate what effects these improvements would have on their design.

Links with the New Zealand Curriculum
Level 2
Curriculum Level: 7
Learning Area: Technology
Strand: Design and Visual Communication
Achievement Objective: Outcome development and evaluation
Critically analyse their own and others’ outcomes and evaluative practices to inform the development of ideas for feasible outcomes. Undertake a critical evaluation that is informed by ongoing experimentation and functional modelling, stakeholder feedback, and trialling in the physical and social environments. Use the information gained to select, justify, and develop an outcome. Evaluate this outcome’s fitness for purpose against the brief. Justify the evaluation, using feedback from stakeholders and demonstrating a critical understanding of the issue.
  • Thinking - analysing their design work based on a focus.
  • Using language, symbols, and texts - talking about their ideas for the analysis.
  • Managing self - Using the RISE values when doing this work on their own and staying on task.
  • Participating and contributing - Giving suggestions to the whole group. Listening to the suggestions of others. Using these suggestions with their own work.
  • Relating to others - responding to the ideas of others in a positive way.

Prior knowledge
The students have been working through a series of exercises about design analysis based on the SOLO taxonomy structure.
They have design developments and / or final designs to write a written analysis for.
Lesson Sequence


Session Outline
This work will start all together to remind the students of the exercise activities we have been doing to build their analysis skills.
They will move onto individual work where they will be writing analysis notes about their own design work.
Student Activity
Teacher Activity
  • Sit round the front table and talk together about the analysis skills that we have been using over the past couple of weeks.
  • Talk through the previous exercises with the students, with prompts to remind them what we did and why we did it.
  • As the students are getting on with their own design analysis work, sit with them and provide one to one help where needed.
  • Check through written work on Google Docs as they are doing it to provide suggestions and support.
  • Scan student's work when complete and upload to the class Google Plus Communities
  • The students will use their own design ideas - both design developments and their final designs, depending on where they are up to.
  • Write analysis notes to go with all of their design work using the skills we have been building.
  • Share ideas to the whole group about what we have been doing to remind themselves and others of the skills we have covered.
  • Design work and notes to be scanned and uploaded to the class community - look at each other's work and read each other's notes.
Resources

Google Plus Communities with previous resources in for them to refer to.
Scanner
A3 paper, pencils, colours, outliner pens, drawing equipment.
Next Steps
The students need to write analysis notes on all of their design developments and their final designs to show their thinking.
Reflection and Analysis

What went well.
The one to one work with the students while they were working on their own design developments went really well as we could dig deep into their individual needs for each design. I could ask them very specific questions geared towards their work, not just generic ones for the whole class. The exercises and work we have been doing to build up towards their own analysis has really helped as they were able to tailor what we have been doing to their own work.

What still needs work.
The exercises and support work we have been doing in the last couple of weeks needs to start much earlier in the projects. We need to start doing this at the beginning of the project when we are starting to look at design work done by others.
Year level specific support documents could help the students while they are getting on with their work. It is difficult for me to get round too many of them during a lesson as the work we are doing is in depth.


Student Work

Class Google Plus Communities

Tuesday, September 12, 2017

Visual Planning

My inquiry this year included this last part :-

The measurable outcome ...
This is targeted towards achieving the school focus of  16+ credits at Level 1 and 14+ credits at Level 2 and 3 for each subject that the students take.
This work is also to enable more access to merit and excellence levels on the NCEA DVC standards.

To this end, I have started planning for next year.
The option choices have started coming in from the students for next year and I am delighted to hear that I am getting and option line that has Level 1 DVC by itself without sharing with Level 2 or 3. This means that I will get my Year 1 group by themselves next year. FANTASTIC news. 

With this in mind, I have tried to plan a year where we focus on a course in depth and with the quality and time allocations needed to get to merit / excellence.
I decided to do my initial planning visually using an iPad app called Mindnode.
I worked out what credits were on offer for each of the standards I wanted to cover, so what time allocation they needed in order to to work.
I work on 10 weeks for each of terms 1, 2 and 3 then another 3 weeks on term 4 before the work gets sent away. So that gives me a total of 33 weeks. 
The figures are worked out on 10 hours per credit and 50 minute lessons 6 times a week.


I have done the same for Level 2 and Level 3.
The difference here is that there is a technology standard in each one that is being covered at the same time as the DVC standard. As most of the work completed in the project covers both standards, I have not given the full 60 hours for them separately, but added time onto that project from the Technology standard so that all elements have time to be covered. (AS91356 and AS91610).

Another difference with the Level 3 course is that the external work is taught explicitly and separately and leads into a design project.(unlike Level 1 and 2 where the work they are doing already in the projects is sent away to be marked for the externals I have chosen to include).
This Level 3 external is what we do first, at the start of the year, as it leads into the first project. So this work needs to be included in the year's time allowance.


Friday, September 8, 2017

Presenting at the Manaiakalani Boards Forum

Last night, I was asked to be one of 6 teachers to present at the Manaiakalani Boards Forum. These 6 teachers represented the 6 achievement challenges for the Community of Learning.
What was really interesting while listening to the other presentations by my colleagues, was the fact that similar challenges to student learning were becoming apparent in inquiries across the cluster. One of these that stood out the most was literacy and vocabulary in all areas. This is definitely something that the future of my inquiry will be focussing on.

We had to put together presentation display boards for the board members to look at. These boards outlined our inquiry to date.


We then took turns to stand and explain our inquiries to the board forum.


This is the slide deck that I presented about for my inquiry.


Wednesday, September 6, 2017

Literacy in Action

I was lucky today to visit Panmure Bridge School to watch +Robyn Anderson with her class. She very kindly offered to be teaching a maths class when I visited so I could watch how she approached literacy and vocabulary in a subject other than English.
I have just started working on literacy strategies in my inquiry as I have realised that this is holding them back in progressing in the SOLO levels and are unable to move onto analysis. I have been working with the English Department on some strategy ideas and was delighted to be invited to visit Robyn's Year 7 and 8 group to see what they do.


My key take outs from this session are ...

  • Make the new vocabulary words the focus before they even know the meaning of them. Let them get used to what they look and sound like.
  • Working in groups to encourage talking and sharing the new learning.
  • Making the students use the word straight after researching the meaning, so they see it in context and are not worrying about writing and typing it up with a definition that they are copying and pasting.
  • Short, fast paced activities that kept their interest and encouraged competition and group / team work.


Here are the notes I made at the time, during the lesson (unedited) :-

Key words are written up on the board
To recognise the different types of angles

They met angles for the first time a couple of days ago and are now going to learn some maths language to do with these angles.


New words are introduced
All angles have a name like the students do.
The correct name for elements is important.
Recap what they already know together - they all call out the words they know together when asked questions.


Challenge - working in teams - find out the names of angles.
Move to work in groups of 4.


This is a brand new topic to them today so there is a lot of teacher support at this point.


 Words are given to the class that are new. The teacher says the words to the class.
Class are given time to say the words to each other.
The vowels are taken out of the words and the class are to say the words to each other again.
The teacher then points to words on the list and the students say them all together.


Class to set an online timer.
See how long it takes for them to each say all of the words in the list - using the words with the vowels missing.


The class are mostly ESOL so this activity was a fun one to get them used to the new words. Seeing what they look like and sound like. They raced each other saying the words while timing get each other.


Next challenge is 15 minutes and they have to find what the words mean.
They then have to label the diagrams with the correct name. They have not been told what the new words mean yet.
The class are to put the new words on post it notes and stick them on the board next to where they think they are to go on the angle diagrams.
Working in small teams - they don’t all have to work on the same word at the same time.
The students do not have to write the definition anywhere for this activity, so they don’t have that pressure of writing or getting the wrong definition from the dictionary.
They have to talk in their groups and decide which word goes with which diagram.
The teacher physically takes herself away from the students so they are encouraged to talk together about the problem.

The students have also drawn the angles in their books and are adding labels to them there too so they have this to refer to afterwards. They go through the angle answers together at the end of the activity and the students label the drawings in their books with the correct names.
Definitions are written with the labels so the students are clear what each one is after their own research.


The teacher is encouraging the students to let all of the team join in.


The key words about line types at the start have been repeated about 6 times during the session with the teacher demonstrating different types of line with pens and rulers and getting the students to shout them out.
This is happening while they are learning the new words about angles.


The students then got out protractors and could see the angles and degrees for themselves and compared them to the definitions.


Summary exercise - in a set number of words summaries one of the angles they have learned about.
They can compare one with another one so they can see the difference.
25 summary to explain.
They were given research and preparation time.
Then given times to make the 25 word summary.
Students given options on how to present their summaries - online how they want, paper and pens - whatever they are more comfortable with to show what they have learned.
This is not pretty work - it is working notes so they don’t have to spend time making it look pretty - the content is the key.
Working together to create the summary means they have to talk and collaborate.
The class are paused while putting together the summary to emphasize the need to use the correct vocabulary and words. Use the new technical words they have used in context.

Lots of conversations about the best way to summarise what they have been learning.

Wednesday, August 30, 2017

Product Analysis with Year 10

I have had a certain amount of success recently by doing product analysis with my seniors all together as a class, where we talk about the products. Class OnAir lesson about this here.
I thought that we would try this together with my Year 10 class. I have been planning literacy strategies for this class based on SOLO taxonomy and in collaboration with the English Department. Blog post here.
So far, this class has looked at different types of portable speaker and read a description. We have started some design ideas of the front of the speaker (drawing in 2D). What we need to move on to is analysing their design ideas.
The plan for today is to do a group activity first. We will all sit together and analyse the example I have put together. They just need to say their answers in front of the whole group, with no typing for them at this point. They need to listen to each other and share their ideas verbally.

Link to this Google drawing here

Then, I want to move on to them analysing their own work. I want them to choose 2 of their design ideas, which I will photograph and share in the Class Google Plus Community. The students will have to get their photographs and put them into this template.


I have made an example of what to do with this template with a drawing of my own that I photographed from the board when we were doing design ideas. (This is why the drawing is not great and not in colour!!) I will go through this example with the class so they can see what I did and why.
Link here