Wednesday, March 4, 2020

Inquiry Group - Know Your Learners - The Statistics

My inquiry group this year is my mixed level seniors class. This is a mix of Year 12 and Year 13 students who have a wide variety of experience doing Design and Visual Communication.

These charts show the ethnicity breakdown of the Year 12's and Year 13's separately.


These next tables show their achievement at NCEA Level and Level 2.

Year 12

Level 1
140
288
3NA
426
543

Year 13


Level 1Level 2
112380
28881
3111113
4109115
59465
6yes89
77153
83054
9414
107559
116430
124548
138261
149367
155031


Year 12 Literacy 

The NA is the South African student who has come to Tamaki College this year so does not have any NCEA data.


Year 12 Numeracy


Year 13 Literacy

All Year 13 students in this group have numeracy and literacy which is great.

AS91627 - Texture and Pattern - Prep for students

Planning for AS91627 - Producing texture and patterns from their observational drawings.
Part 1 of looking at the design elements to develop their work in a more abstract way.

Learning Outcomes

  • Look at their drawn work in different ways.
  • Learn how to use a wider variety of media to create their work and rely less on the standard use of drawing pencil and coloured pencil.
  • Create textures and patterns that are relevant to their starting point observational drawings.


Materials and Equipment

Drawing pencils - only to be used in a support role, not as the main media for the work
Black gel pens
Laminated clear sheets (A4)
EVA foam sheets
Press print sheets
Scissors
Printing inks - various colours
Oil pastels
Soft pastels.
Paper and card - various colours, textures and weights
Pattern / template sheets / sequin waste sheets

Observational drawings in pencil and various media.
Look at these drawings as a base to find shapes / patterns and textures to use.


Methods used :-

  • Rubbings on brown paper with 2 colours of oil pastel used on top of each other.
  • Press print cut into shapes chosen from the observational drawings, pattern pressed into the surface, used to print repeat patterns with the printing ink.
  • Template of poppy seed shape cut out of card - used to draw round and then black gel pen used to draw patterns within the shape.
  • Soft pastel rubbed through the sequin waste to create dot pattern within the card template shape.
  • EVA foam sheet cut to shape using the same card template. Scored in to the surface and used to print with printing ink.
  • Cut the same EVA foam piece more and reprint with it in a different colour.
  • Use gel pen and plastic laminate sheet to trace small pieces from observational drawings - press these onto the sheet. Do multiple times to create pattern with small drawn elements used as print.


Sunday, March 1, 2020

Inquiry Question 1 - An Inquiry Stocktake

Question 1

Use the ‘inquiry stocktake’ doc to reflect on and write about what you aim to learn about inquiry this year.

My main takeouts from doing this activity are :-

  • What worked well - using the in-school and in cluster expertise.
  • Challenges - finding relevant literature about what I was trying to do
  • Additional support - more working together as CoL teachers, giving feedback about what each other is doing


If you want to read the full document, it is listed here below.


An inquiry stocktake


Aspects of inquiry
What worked well
Challenges 
Additional support that would be helpful
Identifying valued learning outcomes (VLOs) to focus on
Having subject specific data going back years to see where the gaps are.

Getting student voice from previous years.

Looking at NZQA exemplars to see where gaps are in what I am preparing for the students.

Aligning want I want to do with the overall goals of the cluster, the school and the department.
Having CoL sessions where we focus on goals and how to approach them.


Profiling students’ learning in those VLOs
Using school data to see where the students are in relation to their achievement so far. 

Getting support from “specialists” in order to understand the data coming out of the asTTle and PAT tests.
Not knowing more personal knowledge about students that may be affecting them. (i'm not talking about breaking any privacy here, but just knowing that there are issues that are affecting them would be very helpful)
Health centre, dean and tutor teacher support.

Talking to the other teachers of the students.
Generating hypotheses (especially teaching) 
Talking to other teachers - especially “experts” in their area.

Talking to the students.
Not sure if what you are thinking about is going to make a difference.
More time during CoL PLG to discuss with each other what we are thinking about.
Testing hypotheses (investigating own teaching)
Trying new things and being honest about if they have “worked”
Not being sure if what I am trying is not working just for these students but it might still be a viable idea to try with others.
Have someone else looking over what I have done and giving input on what they think. Is it the idea, the situation, the teaching or the students?
Using research literature and other sources to identify more effective approaches
Reading online and downloaded books and pdf’s.
Finding literature that is relevant - a lot of time is spent searching. Access to academic literature.
A central “bank” that we could all add to so we can see a breadth of reading being done and dip in

Access given to academic literature.
Implementing new approaches
The school being very open about trying anything new.

I don’t have any worries about changing any part of what I am doing with my teaching.

Worrying about wasting valuable NCEA time on an “idea” that might not work.
Being able to talk over ideas with someone before trying them.
Monitoring (and tweaking) new approaches
The Causal Chain flow charts were really useful to see cause and effect - to look back on to see what the plan was and where changes to the plan happened along the way.
Ideas for changes to make.
Ideas for monitoring what is happening and seeing if there is change that aren’t easily measurable.
Having another set of eyes - to coin a phrase from the class of Robyn anderson - a “critical friend”
Evaluate shifts in own teaching
Honesty. I am not shy about admitting something I am doing is not working. 

I want to go back to videoing myself again as I did in Class OnAir as it gave me a really good insight.
Evaluate shifts in student learning
Honesty. I am not shy about admitting something I am doing is not working. 
I need to do more student voice without boring the pants off them.

Trying to get the truth in student voice. They put what they think you want to hear sometimes.
Ideas in different ways to get student voice would be really helpful so I am not shoving Google Forms at them all the time.
Keep a clear and detailed record of all stages of inquiry
Keeping an ongoing record on my blog, and not just at the prescribed points but during lots of other planning and activities.

Getting support from Wolf Fisher (Aaron) about how to collect evidence that was not numerical data.
Getting honest feedback as I go from other teachers as to what they think is working or not. Getting any feedback at all sometimes is an issue.
Feedback from other CoL teachers on our blogs, as they are going through the same process as me and understand the challenges and what we are trying to do.

Saturday, February 29, 2020

AS91627 - Texture and Pattern

Link to class site
Link to standard

Today we started looking at design elements in response to our observational drawings.
We started with Texture and Pattern today.

I am also including the Year 12 students in these activities as they have reached the point in their work, AS91340, where they are looking at the design elements of their chosen design era.

We went outside with different weights and colours of paper and oil pastels and looked for textures to do rubbings from. These had to link back to what they had seen in their observational drawings.
This was a very busy activity. The students were moving in and out of the class, dropping off things they had done and picking up more supplies. I did not get any photos from this part as I was too busy joining in.
We then cut our rubbings into strips and stuck them onto backing paper. This was then placed at the left hand side of a coloured piece of A3 paper.


Next, we looked at our observational drawings again and picked out a flat shape from them.
This was drawn onto press print and the shape cut out with scissors. Pattern / texture can be pushed into the surface using a pencil. Different colours of printing ink was painted onto the press print and then we printed these as a pattern going across the rubbings onto the main page.
On my examples here, I used the drawings I did of poppy seed heads, The rubbing textures I chose was to reference the ribbed lines and the rounded shapes you can see.
The press print shape was taken from the shape of the papery part at the top of the seed head.
I did these with the students so they could see the process at the same time as they were working.

Here are some photographs of the point the students got to today. They need to continue with this activity in some cases and then we will move on to more work on pattern on the rest of the page.
Only about half the class were there today, for a variety of reasons, so the rest will make a start on this on Monday and they will have the added bonus of the rest of the class knowing what we are doing.

Student Feedback

After Wednesday's lesson, which was a little out of the ordinary from what they are used to, I have had a variety of responses from the students

A
"miss, what on earth were we doing yesterday?" said A as he came in the class the next day "non of that improved my drawing skills"
" no A", I replied, "it wasn't supposed to do that. Only you can improve your drawing skills with practice"
"oh" he said "oh yeah, I suppose. It was about confidence wasn't it?"


J
"wow the room was so hot to be in there all day"
"it was good though, I learnt a lot"

C
" all day was too long miss. I was dead at the end"
me "what about the content?"
" oh yeah, that was great. I learned lots of new things I can use in my work"

K
"miss!!! Why are we doing this?"

I love it when they are confident enough to go "WHY?" at me.


.

Drawing Music

After out great day with Pippa Lawler on Wednesday (blog post here), we had a single period the following day. The class was small as there was two Trades Academy courses going on so the students were out. We also had a short class as there was going to be a Year 12 and 13 assembly.
I decided to have a go at "drawing music". This came about after Pippa had the students go outside with paper and pastels and draw what they could hear. Today, I played different types of music while the students had their eyes closed and makes marks on paper in response to what they were hearing.

I played them Eminem, Strauss waltzes, Movie themes ....

The sort video here shows them standing up to try and get more movement going. Please excuse the jerky video as I was walking round the room and dancing a bit as I was going.


The response from the students was varied. They started feeling silly and that I had possibly gone a bit crazy. They loosened up a lot over a few songs but still felt really silly. 
A good question came flying across the room ...
" why are we doing this miss?..!!" ...... with a bit of a WTH tone.
"That was a really good question", I said "you need to loosen up and think in different ways when you draw"

Thursday, February 27, 2020

DVC Scholarship Day

Today was a full day of learning with Pippa Lawler.
To start with, for the first two periods of the day, I had my whole senior class of seniors, which is a mixed class of Year 12 and Year 13 students.
Pippa worked with the whole class for those first two sessions and then with the 4 scholarship students (plus 1) and myself for the rest of the day.

Whole Class

Walking round the room
With the whole class, we started with movement activities.

  • Walking anywhere around the room
  • Walking in a circle keeping the same distance between us and and keeping to the same speed
  • Repeat the last instruction but count backwards from 1000 in multiples of 7 - we all went wonky on this one!
It takes just as much brain capacity to make small decisions like what kind of pencil to use as it does to make big decisions. Don't sweat the small stuff. Don't take up brain space with stuff that doesn't matter.
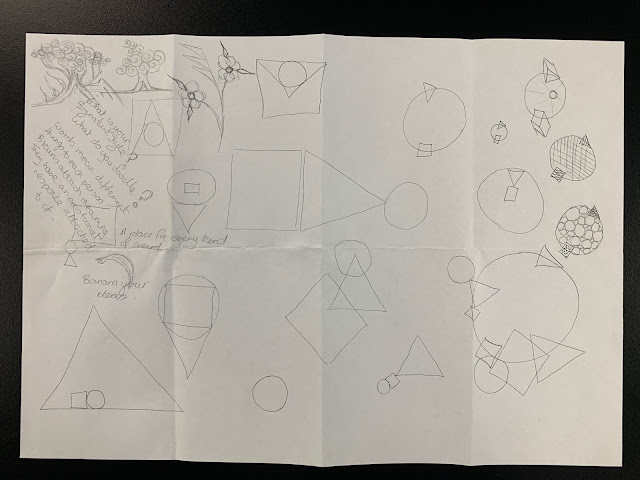
Circle, square and triangle
We did drawing exercises involving just using a square, a triangle and a circle. Draw them in 20 different ways. Choose one and draw it 5 times - 3 the same size, 1 small, 1 big. Pattern one with lines. Pattern one with dots and circles.
Doodles
Take note of your doodling - this reveals your "signature style" a lot of the time. What people are saying to you comes out in your doodles. Try doodling as you listen to someone talk about themselves.
Think of a Dog
When people are asked to think of a particular thing then describe it, we all describe something different. Words are very personal thing, we think of different things when we hear the same words. Your brain attaches meaning to words and these meanings are all different and personal.
Go for a walk
Go for a walk round the quad armed with small pieces of sugar paper and oil pastels. Draw things that you notice. Come back to the room in 5 minutes.
Go to the same place with smooth paper and coloured pencils. Close your eyes and draw what you hear.
Rubbings
Tae a small piece of paper and some soft pastel and do rubbings of textures that you find. Take another piece of paper and try folding it to replicate that texture.
Using apps
Take photos of your work and put it through apps on you phone - Paper Camera

The walk round the room exercises - that was to demonstrate heuristics. Circle, triangle, square = Bauhaus and form follows function (Walter Gropius)


Scholarship Group
The rest of the day (4 periods) was spent with the small group of students who are trying for scholarship DVC this year.
We spent a lot of time looking at things differently.
The rack of scissors
Pen on paper. Follow the outline of the rack of scissors with your eyes and follow that movement with the pen on the paper. Don't take the pen from the paper, it is a continuous line. Don't look at your drawing.
The spaces between
With marker pens on white paper. Look through the holes in the scissor handles and draw with the wide end of the marker the spaces between things.
Cut strips of paper, thread the strips through the holes and around the individual pieces.
Media
Torn paper against different papers to put work over both.
Press printing
Tissue paper coloured backgrounds - Think about the backgrounds, don't just go straight for plain white paper.
Soft pastel through template - cut / torn templates - found templates for pattern.
Create pattern using repeats and rotations.
Use less drawing pencil after the initial drawings. Use media to explore the starting points.
Use the design elements to explore with - 
line, shape, form, colour, texture, pattern
Fill the page with work, exploring. Don't just put one or two drawings on there and leave it. Make sure every part is explored.
What if I ........?

We ended the day looking at electron microscope images of their chosen starting points. This got us thinking in very different directions.
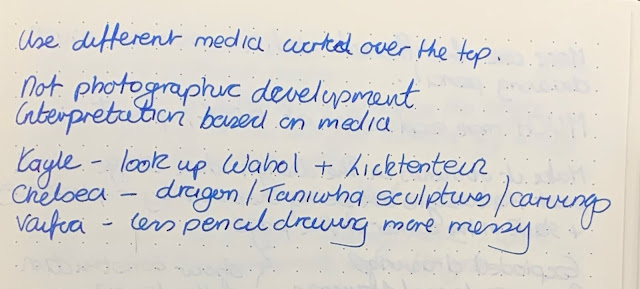
T - is going to look at weaving (her starting point was peacocks)
C - is going to look at carvings of taniwha (her starting point was dragons)
K - is going to look at Roy Lichtenstein and Andy Wahol, looking especially at the dot pattern to create images (his starting point was the human face)
V - has electron microscope pictures of butterfly wings and needs to use less pencil and work looser. (his starting point was insects)
Some of the work from the session today ...
Quote from the day...
There is a place for every kind of weird
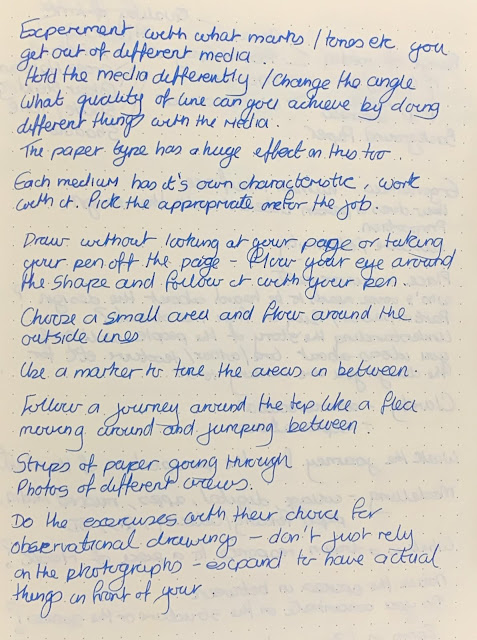
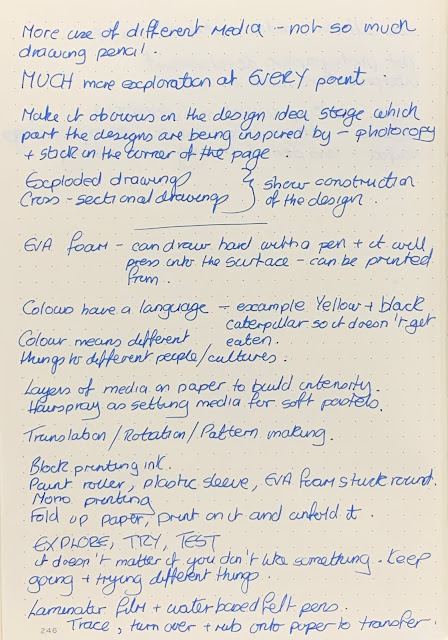
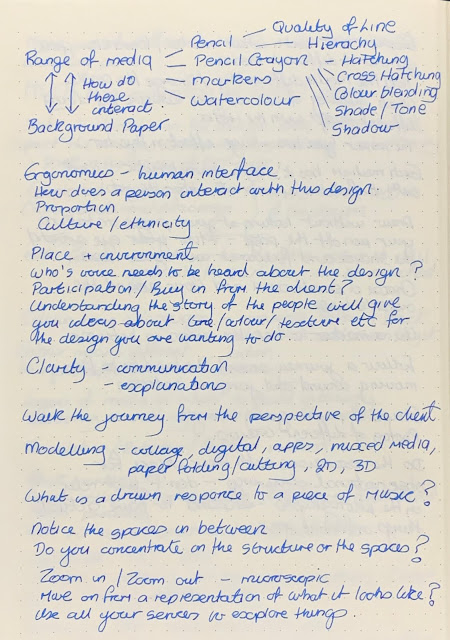
My notes from the day .....
Friday, February 14, 2020

Coding with Year 7 - Lesson 1

I have been preparing for my coding lessons with my new Year 7 class this year. I wrote a blog post here about how i was going to be looking at Algorithms.

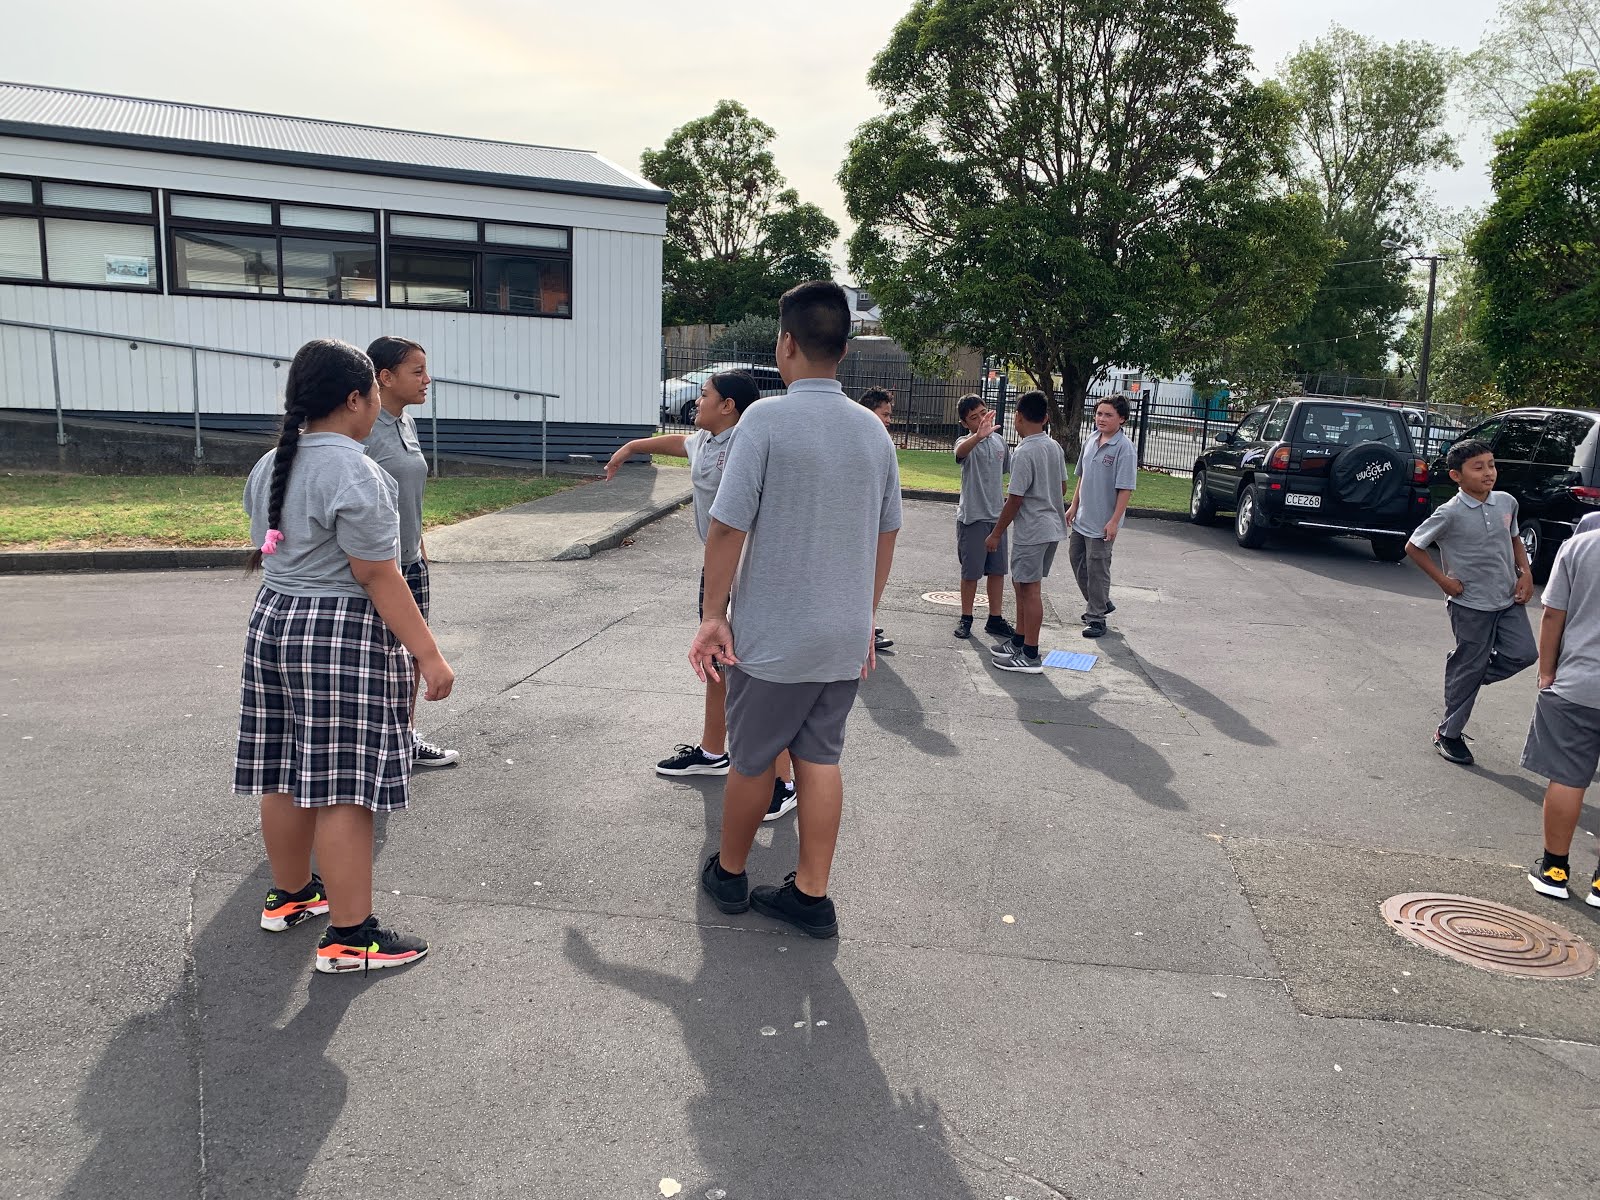
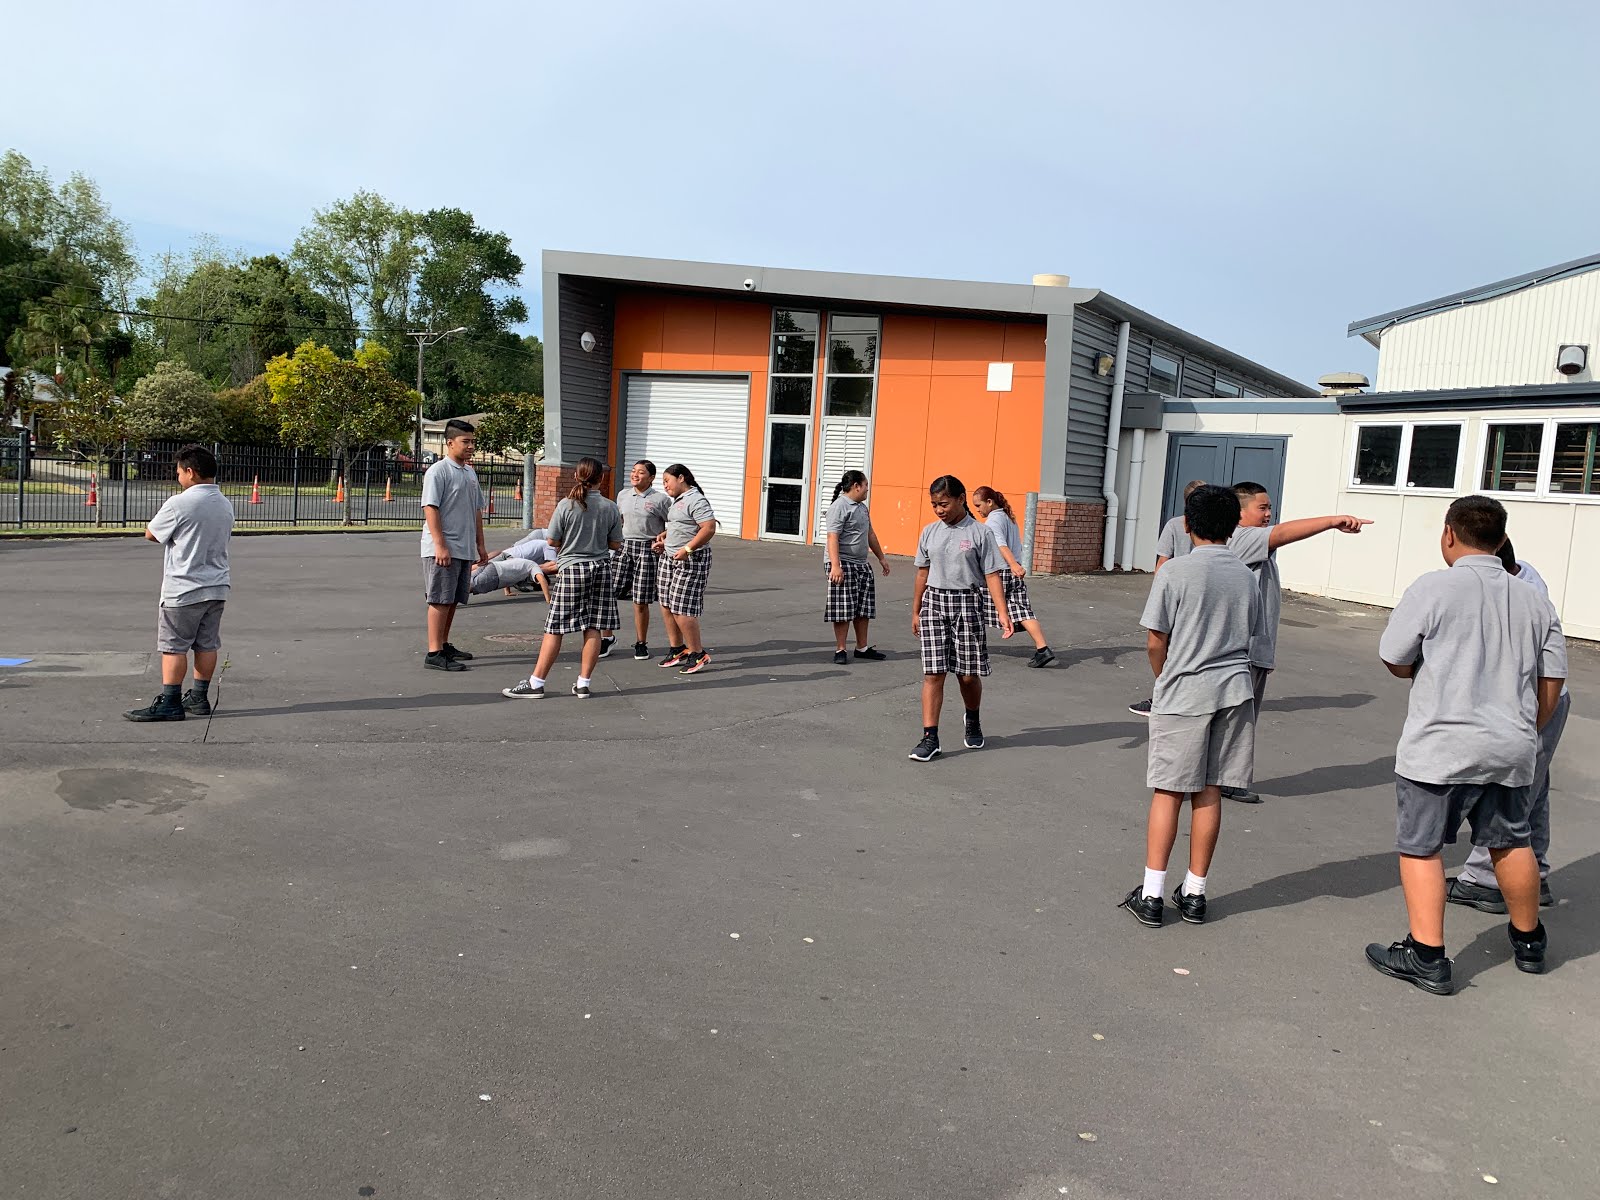
Our first lesson was today, and after  we all got on my new website, found the work and I had given them a brief description of what an algorithm is, we all went into the carpark to try some out.


  • They got into small groups and decided who was the programmer and who were the robots.
  • Instruction 1 - The programmer had to give their robots one instruction and watch them do it then give them another and so on.
  • Instruction 2 - The same as one but they had to give two instructions.
  • Instruction 3 - They have to give 3 instructions bit include more details like direction and how long or how many.
  • Instruction 4 - They have to give 5 instructions, include details, one has to be sound, one movement in a line, one a dance movement
  • The programmer had to give the "algorithms" and the robots had to listen and remember a sequence of instructions.
We then got on with the rest of the prepared lesson as it is on the class site. We didn't get as far as I had planned as we spent a little more time playing in the carpark than I intended.

Things to note for next time :-
Check the mBots are charged - we had a couple of flat ones today
Check the boxes all have 6 in them - there was one with 3 today
The link to a copy of the presentation worked well and saved time.
They all got online fast and found the site and work very efficiently.


Wednesday, February 12, 2020

Preparing for my first Year 7 Coding Lesson

I have my first coding lesson with a year 7 class on Friday.
I have had some experience of teaching coding last year to a Year 8 class last year where we were making an mBot robot follow a black line using sensors.
Blog post 1     Blog post 2
With this, I was using the planning of Mr Dunn as he had been doing this with other Year 7 and 8 classes.
This is my first year planning for it myself.

To start with, I am going to talk to my Year 7 group about what an ALGORITHM is. We will relate it to real life things that they know about and my example will be knitting.

Input - the wool, the algorithm - the knitting pattern, output - a jumper.

This table is what we will fill in with everyday examples. Link to Google Drawing here.


Then we will move on to having a bit of a play with the mBots and a first go at using the mBlock software.
This is the link to my site where I have put all of the activities for this.
The activities are listed on the drop down under Y7 and Y8, coding.


This is the presentation with the first coding activity for the mBot. We are making coloured lights.
I have set it up so it is very visual (I am a graphics / design teacher!!) and so they have to put evidence of their work and thinking as we go.
This one is very simple in order to get them used to using the mBot, the online programme and having to evidence their work with screenshots, videos and analysis of what was happening.
This needs to get more complex as they get experience so they can start deeper analysis of what they did, what happened, what went wrong and what they did to change things.

Manaiakalani Cluster Staff Meeting - Student Achievement Feedback