
Link to Manaiakalani Class OnAir to see the whole team.
Direct Instruction
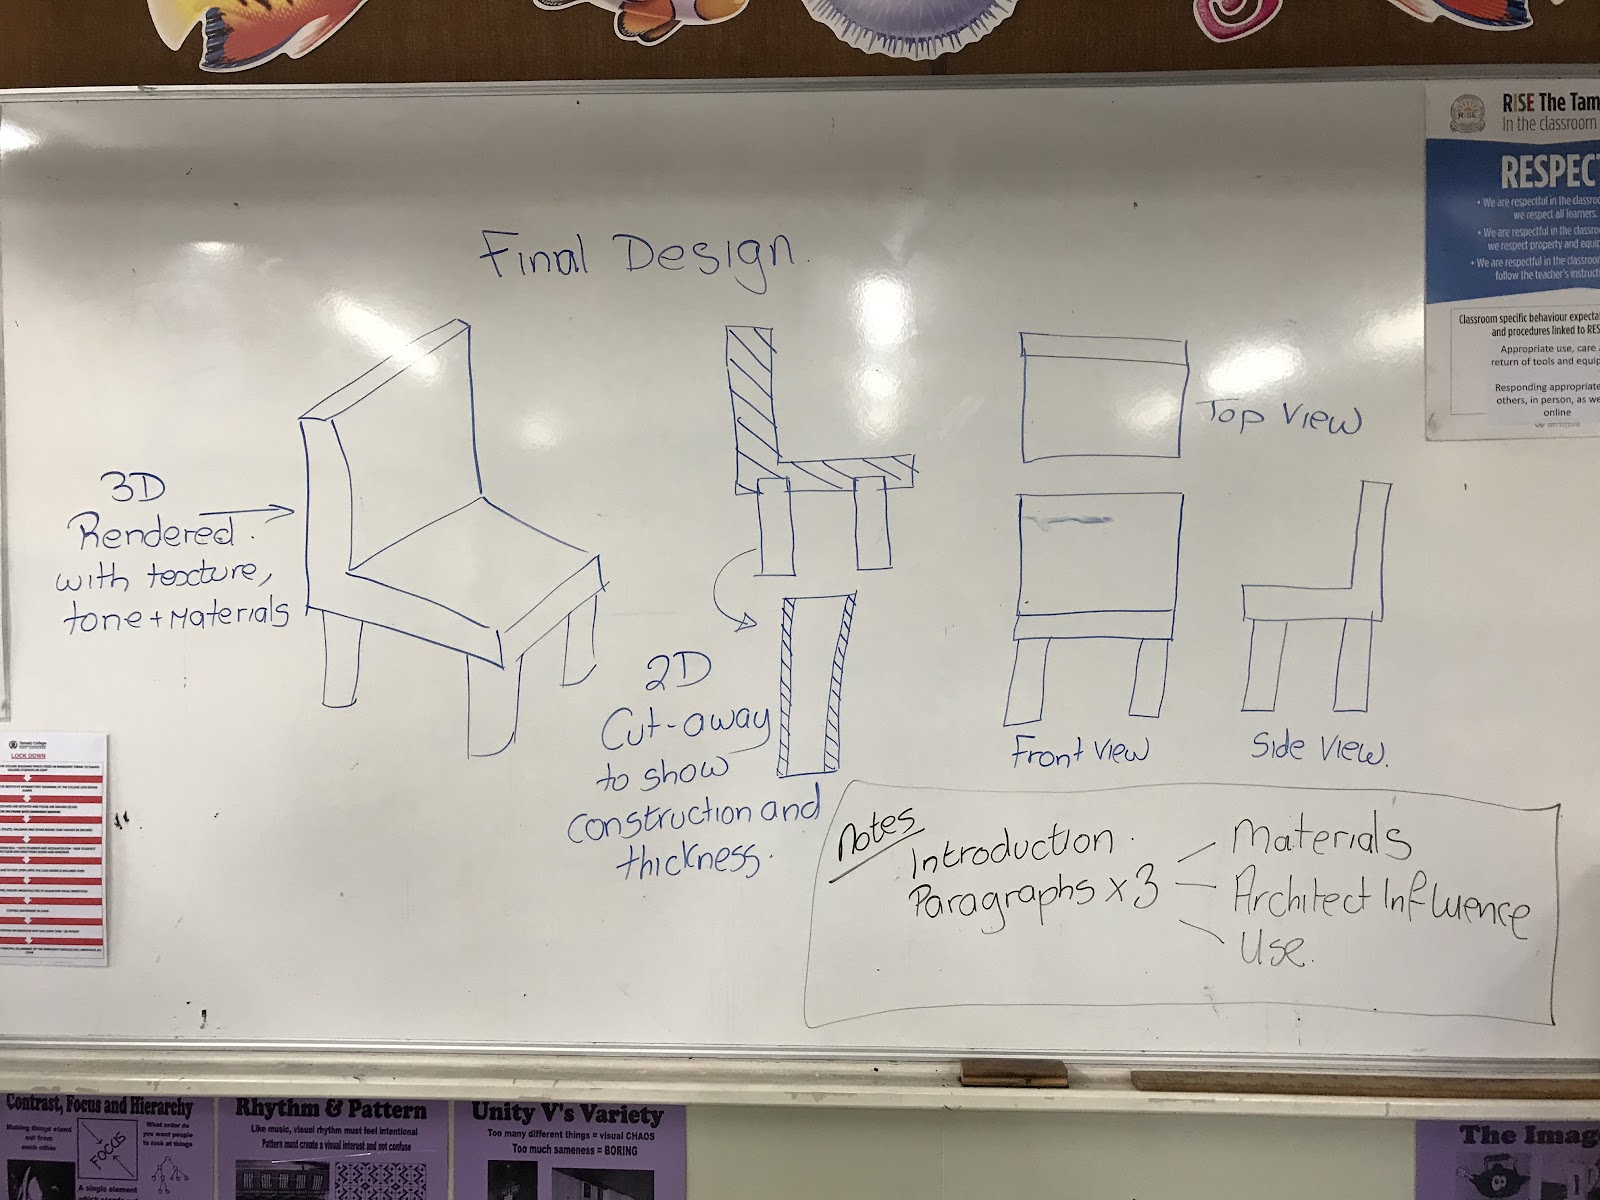
The instruction to the whole class was quite brief as it was reminding them of all the elements that needed to be included on the their final design sheets. I had prepared the board in advance so they could see the layout I wanted them to follow. The rest of the instruction through the lesson was on a one to one basis depending on the needs of the students.
Here is some of the ongoing lesson
Reflection
This work was a culmination of a much longer series of lessons based around analysis, design and literacy. I feel that the students did well as they were pulling everything together that we have been looking at over my inquiry.
Class Site Content

This is a diagram explaining the input the students have had from my inquiry about subject specific literacy.
Learner Generated Content


Extended Lesson Plan
Lesson Topic :- Final Chair Design Sheet
| |||||||||
Year Group :- Year 11
| |||||||||
Learning Outcome
|
To be able to use all of the skills regarding drawing, rendering and analysis to produce a final chair design presentation sheet.
| ||||||||
Success Criteria
Using SOLO
|
| ||||||||
Links with the New Zealand Curriculum
 |
NCEA Level 1 - Curriculum Level 6
Outcome development and evaluationCritically analyse their own and others’ outcomes to inform the development of ideas for feasible outcomes. Undertake ongoing experimentation and functional modelling, taking account of stakeholder feedback and trialling in the physical and social environments. Use the information gained to select, justify, and develop a final outcome. Evaluate this outcome’s fitness for purpose against the brief and justify the evaluation, using feedback from stakeholders. | ||||||||
 |
| ||||||||
Prior knowledge
 |
We have done a series of literacy exercises to build up to this point.
We have done sketching and rendering techniques in 2D and 3D.
We have done research about materials.
| ||||||||
Lesson Sequence
 |
| ||||||||
Resources
| 
A2 paper
Drawing pencils
Coloured pencils
Graphics marker pens
Pastels
| ||||||||
Next Steps
|
Next Lesson
This task will take longer than one double period, so it will need time in following lessons to complete everything.
Further in this project
This is the end of this project, but all of these skills will be used in the next one.
| ||||||||
Reflection and Analysis
| |||||||||
What went well.
Lesson Content :- The students knew the main bulk of what they have to produce for this activity as it is a continuation of both the project they have been working on and the skills they have been covering.
Lesson Pacing :- I knew this was not going to be complete in a double period so the pacing is as expected.
Lesson Delivery :- My introduction was uncharacteristically short but I think this is because it was just a sum up of what they already knew. The delivery throughout the lesson worked well on a one to one / small group basis as needed.
Student Outcomes :- The outcomes are of a pleasing standard and clearly shows what they have been learning.
What still needs work.
Student Understanding :- I still have students who were in the lower ability class in Year 10 who are having difficulties understanding what we are doing at the moment. I do not have a specific example for this layout produced, just the individual things on the class site and the layout sketch on the board, so this would probably have helped. Having examples of 3D rendered products for them to refer to would help too as their understanding and visualizing of what their design looks like in 3D is a problem.
| |||||||||
No comments:
Post a Comment