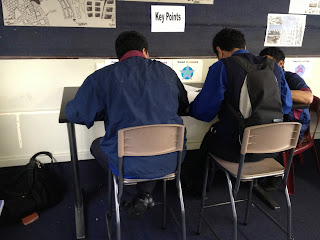
Thursday, December 5, 2013

Extending Student Thinking in DVC

We have been doing a lot of work in the Technology department recently about looking at how we are using SOLO taxonomy to extend the thinking of our students.We aim to hit the new year running with a plan to get the most out of our students. We want them working more often in that top level of Extended Abstract. Link Here to pamhook.com about Solo Taxonomy.


So the question to me is, how can I extend the thinking of my students in DVC ( Design and Visual Communication, formerly know as Graphics ) up into the higher levels of SOLO while using the online learning environment that I have been creating for my students.

We started by thinking about how to get our junior students up to level 5 of the curriculum by using SOLO as the structure in order to do this.
  • What could I do to support the students with the higher level of thinking skills that are needed?
  • How can I use our online work to structure this?

As a department we were thinking about questions that we can apply to our project work to extend the students. My questions developed into something a little more like activities as I got a little carried away. Link here to the document I put together.

I then started to apply this to the project planning on the class Google site, on the junior page.
The project for my junior students is designing and making a pop up book for a young child.
The project link for this is here...

This was a good place for me to start this, as it was giving me lots of ideas of how this could support the Level 1 course and then so feed through to the Level 2 and 3 courses. 

Where the weaknesses are in these DVC NCEA courses is the student analysis of what they are doing and why they are doing it. It is this ability to analyse and then act on what they find that moves the achievement up into the merit and excellence levels. It also corresponds to the higher levels of SOLO as this is how NCEA structured their standards and assessments. If I can build some of this into the junior projects, then I can step them up from this if they choose DCV at NCEA. I very rarely have any issues with the standard of the drawn work from the students who choose DVC at Levels 1, 2 and 3 as they are talented students. The issues have always been the written element to the courses.

On the junior site page, I have tried to structure the support to help their thinking by :-
  • asking a lot of leading questions that link back to what they have just been learning
  • giving them key words and ideas that they can use 
  • using group work in the junior school to collect, collate and structure research work
  • presenting back findings to the class in a method of their choice to get peer support
  • worksheets that lead them to collect and analyse specific information from a variety of sources, and structuring them to be able to use that information to form conclusions and make decisions
I have then tried to apply this thinking to the first project that my Level 1 students do, which is produce a poster to promote the work of an architect.
AS91069 - Promote an organised body of design work to an audience using visual communication techniques. This is worth 4 internally assessed credits.
As there are also 4 literacy credits attached to this internal assessment, it is really important that the students write the information for the poster themselves and not just do a copy and paste job from the internet.
The students also have to analyse what visual communication techniques they have used, what is the most effective and why.
There is a link to this project page here...

I have made a screen cast to show how I have changed my Level 1 project to support the students with their work. I hope that this will lead them to be able to complete their work to a much deeper level of analysis and understanding, so enabling them access to the higher levels of achievement.


Thursday, November 28, 2013

So....moving on....

I am determined that next year will not be a repeat of this one in terms of the posting nightmare that went on. ( see my previous blog post ).

To those ends, I have spoken to the school's Principal's Nominee about the procedure for contacting NZQA about this issue and what we can do with it. She is going to speak to the School Relationship Manager and go over the points that I have sent to her. They will then give us a direction and contact point that we can go to.


Here are the points that I feel are important to get across :-

  • All DVC students produce an online Google site for their research, notes, analysis and photographs of mock-ups, testing and models.
  • They produce their design ideas on paper with traditional media.
  • Design development work done in 3D as models is photographed and presented on their Google sites.
  • Design development work created using online applications is presented on their Google sites as embedded objects or screen shots of the work produced.
  • This year, in order to be able to hit the submission requirements, everything had to be printed off from these sites, which was a very long job using lots of paper for coloured print outs.
  • We need to be able to just send the drawings and sketchbooks that have been produced using traditional drawing media and everything else needs to stay online, with links to the student online Google sites being sent to the examiners in order for them to see the rest of the project work. The drawings are then still seen in the context of a whole project, and the analysis notes that go with them are there to be viewed.


So, I hope to be able to report progress on this.
We shall see.


Monday, November 4, 2013

NCEA external posting not a lot of fun this year.....

Ok, so it is never the most fun time during the year, getting the Level 1, 2 and 3 DVC work together and parcelled up to send away to be externally marked. ( Design and Visual Communication, that used to be called Graphics ). It is a case of leave me alone and don't talk to me and any offers of help are brushed off. I turn into mrs grumpy pants for a couple of days while it gets sorted out.
This year, I made a start on Friday as the day had moved forward from its normal Wednesday slot to Tuesday, and I know it always takes me about a day and a half to do it all. 
My HUGE gripe this year though is having to print out all the students research work, photographs of models and analysis notes that they had done on GAFE products  and embedded on their class sites.
It took a good two and a half hours of my day today printing off a big pile of work onto paper just so it could be posted to Wellington as part of the projects that the students have done. 
I agree that the examiners should see the actual drawings on paper that the students have produced, as scans and photographs of them do not do them justice, so they should be posted. No problem or argument there, but where is the sense in printing all that stuff today, and trust me there was a PILE of it, when all I had to do was print a list of shortened URLs on one piece of paper for each examiner, where they can go online and see the students Google sites with  all their work on. 
Come on NZQA, the students are wiping the floor with you in terms of working in the 21st century. I am sure all your examiners must have access to computers and the internet. Surely? Why can't the way the students work be the way they are marked and assessed too?
Ok, rant over. I have had a REALY busy day today, made worse by not being able to get on Chrome on the school desktop with my log on and Internet Explorer being such rubbish with GAFE products ( no, it wouldn't print from IE, stupid thing ). After having a mild meltdown, I ended up on some one else's desktop log on and my chrome log. Makes no sense but it worked and the printing commenced. 
Please, NZQA, sort ya life out.

Here is a link to the portfolio submission instructions.
Everything has to be able to go in the bag they send, as a portfolio.
I am going to contact them and start a dialogue about being able to supply links to Google sites for some of the project work. Wish me luck....

Sunday, October 20, 2013

Google Help Outs - Take 2

After the aborted attempt at signing up for Google Help outs a couple of weeks ago (blog post here), I have been meaning to phone them up and sort it out. Meaning to..... meaning I keep forgetting to....
So, they contacted me via email, which resulted in me having a phone conversation with a very nice lady who sorted me out with a sign up code for my personal email address.
They were very quick in getting back to me, and this morning I received the email regarding booking in for the "New Provider Introductory Session" hangout. There was one available an hour later, so I booked myself in. An hour of fussing about, shower, hair.....sigh... anyway...I was ready.
I clicked join hangout when the call came through and was promptly told I had to install a plugin for hangouts. Of course I had forgotten that this is my new laptop. So after clicking install and praying it wouldn't take too long, I was ready.
A couple of connection issues later and I was talking to Dillon in America. He asked me a few questions about what I was planning on offering and I asked him loads of  "how do I do this..... " type questions.
This was my first experience of a Google hangout. I am bad enough on Skype with my family, I can't look at myself on the screen. Talking to a complete stranger on video this morning, all I could focus on was the bit of hair that was sticking out from my head.
Note to self when I start ( if I get the OK ), don't look at yourself on the screen, concentrate on the problem in hand.

Here is a link to my Help Out. 
I don't know whether the link will work for others to see as it is "pending review".

They are not sure of a start up date yet. I presume they want to sign up a minimum number of people to offer Help Outs. It won't be long though, so I have to practice with some one on hangouts, sharing screens, sending files, etc, so I don't look like a complete spoon if they sign me up.

Thursday, October 17, 2013

Help Sessions are all go...

We kicked off the term with a help session this afternoon. I decided to keep the first one a bit free and easy, so people could come in and get help with what they wanted, rather than it be a structured topic.
So we did a bit of Class Dojo, which was fun, putting our classes in and deciding what they would get awards for.  We then covered a bit of using images for the front page of a site as buttons to other site pages. This then lead on to a bit of what I have planned for next week which is making your own site header using Pic Monkey.  I have a How To on one way to do this here.
It is interesting to hear from staff what they want to cover and it made for an interesting session that went over very quickly..
Gummy bears with the chocolate biscuits today certainly helped.

Here is the rest of the plan for this term.


Saturday, October 12, 2013

Using Google Analytics

I have been working on the "How To" site over these holidays. Every time I have put something new on there, I have emailed the whole staff, so they are probably a bit sick of my emails this holiday and I suspect that I have been put in a few "special" lists. I have also been posting them up in the GAFE Google Plus community. I felt that this was only fair, as I am always going in there getting tips and advice from others. As a result of this, I have had a lot of overseas interest in my How To site, so being a nosy type, I decided to use Google Analytics to track how many visitors i get on that site.

I have been using Google Analytics for a while to be nosey on my class site and the Digital Footprints site. ( links in the side bar ).
You can have as many sites to track that you like, as you can see here on the analytics dashboard, I now have 3.


It is easy to set up, you just have to put a couple of pieces of key information in specific places.
You start in the manage site section on your site, and part way down you will see this box to tick. It will not have a code in at that point, click on the part that says "learn more"


This take you to this, where you need to click the second option, for configuring.


This configuring page takes you through all the steps you need to do to set up your site.


You need 2 things, the code to put in the box and some html that you put onto the pages you want it to track.

I only did this the other day for the How To site, and I am already surprised by the traffic that has come through the site. It gives the information in nice handy little graphs, and breaks it down into where they are from, browsers used and all sorts of other stuff that I really don't care about, BUT, you can never have too much information!!!....


Sunday, October 6, 2013

Google Help Outs

I was  all ready this morning for my Google Help Outs interview. I had been very excited to receive the email with the invite code, so I went straight on and put in the details for my proposed Help Out. I am aiming to do help with GAFE stuff, as that is what I do anyway!!
They got back to me with possibilities for the interview and I was scheduled in for 10.15 this morning.

So.... hair done, looking semi respectable (for a Sunday morning!), I was ready when the reminder ping went for the hangout.
Then it all hit the fan.

The school domain doesn't support hangouts. (It is set to on in the admin dashboard, but I think the hangouts thing is set higher up.)
I couldn't use my personal gmail account as the invite code is non transferrable.
I couldn't get in contact with the guy on the other end.

I was looking at the "waiting" indicator on the hangout notification.
Then I had to click the cancel button for it. I felt so rude to the person sat on the other end!!
You can't email them, you have to phone. On weekdays.
So tomorrow, the plan is to phone them to see if they will extend the invite to my personal account.

I have just come in from the garden, taking out my frustration on the weeds.


Thursday, August 29, 2013

Flipping Great!!!...

I found a great iPad app recently called, Book Creator. I was very interested in having a go at this as I have quite a large collection of really good design books in my class room, but most of them have way too much in them and tend to put the students off a little. I thought that something like this app would give me the opportunity to cherry pick  what I wanted to put across to the students and illustrate it myself. The options on this app are to upload to iBooks or output as a PDF. I was going to go the PDF direction and link these over to my DVC site.
This plan changed yesterday when Dorothy introduced me to an online little gem called FlipSnack.
On this, you can upload a PDF and it converts it into a really cool little book that you can turn the pages of. The embed code gives you the chance to embed this where you want!

Here is a short sample of my book. I have only got the first section of it completed yet so it needs a lot more work, but I was too excited by this not to have a go.
I can see all sorts of things coming from this small start!!!

I have just tried it on my site and embedding the code works really well... have a look here.
I have just noticed something too.... there is a little of the writing missing from the front cover as I had to change the font from Apple Gothic, as this came out blank when I uploaded it. I went through the book and changed all the fonts to Helvetica ( fairly standard ), but I missed one little section on the front. Learning, learning...


Saturday, August 24, 2013

To e or not to e ?..... Blended or eBlended?

I am actually finding it easier to blend everything this year. My classroom has 6 desktop computers (pc's) which have Photoshop and Illustrator on them, as well as being able to go online, and the students bring their devices (either netbooks or chrome books). In DVC, we have always had to do research of existing products and analyse them. BC ( before computers ), this was a case of cutting pictures out of catalogues and magazines. Then it was booking a computer suite when one was available. Now it is when we need it, in front of the students, at their finger tips. What is this product made from? How is it constructed? Instant research available.
The students are finding it easier and quicker to write their design briefs and specifications and analysis online, on either a Google doc or Google drawing, as feedback from me can be actioned without whole rewrites on paper.
Using Google drawings to produce analysis diagrams is quick and easy, with no need to wait for printing of images that they want to use.
The drawings we do have always had to be done on paper, and I personally don't want to see that change. It is a skill that is vital for design work, getting ideas out of your head and down on paper. Rendering those drawings, to get the surface and the lighting right is also a skill that is needed to be on paper. Yes, I know you can get awesome effects using computer programmes, but if you understand the concepts by hand, then applying them with other methods becomes easier to understand. I also think that about model making. Online testing and modeling is all very well, but sometimes you just need to hold the design in your hand, in 3D, there in front of you.
Typing up analysis notes about design work online is easier for some students than writing it next to their designs as they don't feel under pressure to get it correct the first time. No one wants to stuff up notes next to a drawing they have spent some time on.  This is why I have been trialling scanning the drawings this year, so they can write their analysis notes online, next to the scanned version of their work. The same with the photographs of the their 3D models. Saying that, my class have been trying out an online design programme called Floor Planner this term, to help them with the layouts of their batch designs. It has proved an interesting experiment, and I am getting Level 2 and 3 students producing design layouts at home and coming in to school keen to show me what they have been doing! 
Being able to photograph all the testing and modeling during the design development process has been great this year. I always have my phone in my pocket which has a decent camera on it and then the students are responsible for getting their photos from Flickr after I have uploaded them up there, to put in their project sites. This is WAY easier than me printing them all and then the students spending way too long cutting them out and sticking them in their books.

So, if I was to sum up, I feel that this blended approach has made it easier for me and the students. Obviously, to start with, nothing is smooth and easy. We have had bumps. Now we are in the flow, it is going ok, with lots of improvement room and plans for trying new things and making it better.

I like the term blended, without the e, as this reasons that I am using the "e" as just another tool to do the work we need to do, not be the end result. The focus is on the work and the learning. We get to choose from a wider variety of tools now, that is all.

Monday, August 19, 2013

Using Glogster in Food Tech...

After the session last week on Glogster, we had a lot on interest in using it in the classroom.
Carol, the Food Tech teacher was very interested in its use in her subject so we had a go on Friday morning. While her intermediate class were busy with their practical work, I went round with a video camera, videoing the students doing all the steps in the recipe. and when Carol was doing the main skill demonstration of rubbing in, that was videoed too.
The 2 videos were quickly put together on iMovie and hosted on YouTube.

The Glogster was put together to be an interactive recipe, with the recipe in the traditional style, but the method done as a step by step video. The skills video is very similar to the style of recipe apps you can get on online with built in videos.
Carol is very happy with the outcome and intends to embed this onto her Google site. She is very keen to make more of these.


Thursday, August 15, 2013

Saying No to Paper, Scissors and Glue....

We had a session this afternoon after school for those teachers who want another option to making posters using paper, scissors and glue.
It doesn't matter what subject you do or the age of the students, we all make posters to present work, give information or explain things at some point.
To make this an online activity, we mainly looked at Glogster today.
This is a free online poster making tool, but it is more than that. You can embed videos that play on the poster and add moving GIFs to them too.
This makes it very adaptable to individual needs and the staff who came to today's session went away very excited about the possibilities of what they can do with it in their subject areas. We discussed doing screen shots of the students work on Google docs, spreadsheets, graphs etc, and uploading these to Glogster as a different way for the students to present final pieces of work. We also talked about making videos specifically to put onto a Glogster poster. For those students who still love drawing by hand, they can still do that, scan their work in and include it onto a Glogster as a mixed media presentation.
Everyone set up their free Glogster account today and had a play with the basics.
We then went over how to embed a Glogster onto a Google site. This is easy to do, as you just have to grab the embed html code. You just have to make sure you put it onto the html part of the edit page on a Google site. This is good to know as all out staff and most of the students all have their own Google sites. I look forward to seeing what the staff who came to the session today come up with themselves and get the students to do.

Thursday, August 8, 2013

We're all Really Blended...

We had another after school PD session today for an hour. This week's topic was blended learning.
I set up a simple scanner with one of the Asus netbooks, so staff could have a go at scanning work, book pages and worksheets straight into a netbook. I showed them how Google docs rips out the typed words from a worksheet, and lays it out for you. This works for a scan of something or a photograph of a page.
I made a "How To" on this topic here.
At the moment, Google docs is poor at doing this if there is columns in the page you are converting, as it mixes it all together, but we are hoping for improvements from Google here.
I showed the staff how easy it is to install "Simple Scan" onto the netbooks, so they can pass this onto students. It will be good when students can just take their netbooks to a scanner, connect it on and then easily scan the work that they have produced on paper, ready to upload onto their Google drive.
Next, I showed them how I use Flickr in DVC to upload the student work. I have links to this Flickr site on the DVC site so it is easy for the students to find it so they can then find the photographs of their own work, download them and use them on their own sites or documents.
Link to the DVC Flickr here.
I use Flickr for this rather than Picassa as I use my Picassa for images that I want to use on my DVC Google site and I don't want to fill it up with the student work photos. I take a lot of photos as the students are working, especially when they are producing 3D work.
Making the students responsible for finding and downloading their own work saves trying to remember who's work belongs to who and emailing it to them.
We discussed having some kind of camera available in the class when you know when the students are going to be doing something you will need evidence of. I personally have an iPhone, so I always have a semi decent camera in my pocket.

We all work in classrooms where we do a combination of work directly online and on paper  in books or 3D. It is good to have a variety of methods where you can get the work online so it can be all together, be able to be embedded onto student Google sites and documents, and appearing on the teacher dashboard to be checked and marked. This saves staff looking in lots of places to find work. It is all in one place.

Thursday, August 1, 2013

After School PD Sessions are all Go Again...

We had a good time after school today, during our regular after school Thursday "help" sessions.
This week, we covered the basics of using iMovie for creating movies.  We have already covered using YouTube, so now staff are equipping themselves with the ability to create their own content to load up to YouTube and embed on their sites, rather than relying on other peoples' video content.

We started the session by using the Flip video cameras to record a little bit of content around the room and the corridor. Luckily, there was a Media Studies after school session running in the same room, so the students were more than willing to be filmed by staff.

We then went over getting the video footage from the camera up to iMovie, starting a new project, what the areas on the iMovie work area are,  choosing clips, transitions, titles and music and sound effects. By the end of the hour, everyone had put some clips together and used a variety of the things we had covered. They then saved out their movies as mp4s ready for uploading. Not bad for just under an hour.
The students in the room, who were all knowledgable Media Studies students, were amused by staff being taught these basic skills. Cheeky things.

Saturday, July 27, 2013

Holiday PD.....

I have been on some great subject PD over the holidays. It was a 2 day PD for DVC
( Design and Visual Communication ), and we covered rendering on the first day and technical drawings on the second day.
I got a lot out of the rendering day, as I have never used the proper marker pens to produce work before, so I have been busy putting the new rendering skills I picked up this week into practice on the Level 1 project that they are just onto. The project they are on with is designing a mobile phone, and we have previously used coloured pencils to render the final designs to look like plastic and glass. This was then photographed and put into Photoshop to create a presentation sheet.


This year, I want my level 1 students to use the skills that I have just learned. The person in charge of the course this week says that using these skills well will get the students up into the merit / excellence range, which is really good news.
So how do I intent to use Google for this?
I have produced a sample for the students to see, and photographed each stage. These photographs have been put into a Google presentation and put onto the Graphics Google site for the students to access. I have always demonstrated how to produce drawings in front of the class so they see the process from the start. It is good to be able to put the steps online for the students to use out of the class room for practice.

It would be good, once the students get to grips with this technique, is if they made their own "how to" presentations for next year's students.


Paul, who ran the course, was also using a great bit of kit. An over head camera on a drawing board, connected to the projector. This projected everything he was drawing onto the board.
Do I want one of those???... oh yes...

Thursday, July 4, 2013

Learning Lots on our YouTube Session

It is the weekly help session again and this time we covered a few You Tube tips

For people who don't have a YouTube channel yet, it was easier to start from Gmail, as everyone can find that, click on more then YouTube is the third choice down.

When you then click on your log in on the top right, a selection drops down where you choose Video Manager. This is where you would view all your uploads of you have any but on a new account it prompts you to make a channel.


At the top of the screen is a nice big, friendly "upload" button, so we all had a go at uploading a small video onto the newly created channel.


Then we moved on over to having a quick look at the YouTube video editor.

It lists all your uploaded videos which you can then edit together with the simple to use tools that it gives you. It also lets you have access to some creative commons videos, which are good for having a practice.


This is a good place to start for people with no editing experience as it is pretty user friendly and doesn't include too many bells and whistles to confuse the beginner. You can include music, titles and add some simple transitions.

What really got people interested this week was when we looked at playlists.
You can add your own videos to playlists or any that you find on YouTube made by others.

You can access your playlists from the video manager, down the side, underneath the uploads option.


It shows all your playlists and how many videos you have in them. 


When you find a good video while browsing, and wish to add it to a playlist, it is very easy to do.
Underneath the name of the video, there is an "add to" selection. When you click on this, it lists all of your playlists or gives you the option to make a new one.


Embedding a playlist.
When we were experimenting with embedding a YouTube playlist, we discovered that the HTML that you get from the playlist will not work on a Google site, either giving you a "this video does not exist" message or only playing one video from the playlist, depending on where, of the two choices,  you got the code from.
This same HMTL code worked perfectly on a blog. A player is embedded which plays one of the videos with a skip button so you can skip to another in the playlist. you can see the skip button on this screen shot of a test blog.


We have no idea why it would work on the blog but not the site and this was quite frustrating, but people went away happy with playlists on the whole, as they are useful tools to collect like videos together and play them all without having to play lots individually.


Thursday, June 27, 2013

The Moving Help Sessions.....

So the Wednesday afternoon help session has become the Thursday afternoon help session to cater for people's meeting commitments.
Today we did work about Google sites. I covered some basics to start with, which were the questions that I am always getting asked by staff.
  • How to make the navigation on the top and not down the side.
  • How to add pages to the horizontal navigation bar.
  • How to make pages drop downs from the horizontal navigation bar.

This was good for some of the staff who came, as these are the things that you don't do every day so you forget and need refreshers. It was also no hardship for those who came that didn't really need this.

What got people going during this session was the work we did on "blinging" your site.
This was for people who are sick of the Google theme choices and want to make their own but who don't have any Photoshop skills.
We used online resources that can be used and accessed anywhere and on any machine.

Picmonkey
Colourlovers
Cooltext

We went over taking a screenshot of a chosen background from Colourlovers.com then putting it into PicMonkey and resizing it so that it would fit on their site. We then played with all the bits you can add to an image in PicMonkey, like shapes, lettering creatures and critters etc. This took a while as the choices are pretty wide and you can spend / waste a lot of time on these 2 sites.
I hit a frustration corner when I was trying to show the group how to change the width of the site so that it fits with the size of the graphic they have made. We discussed 900px being a good site size for a netbook, which is why we made the header that size.
Google, in their drive to change things and confuse us, have changed how you alter the width of the site and I guided the group to the wrong settings area for a while as we hunted for the correct setting.
We found it across the top of the "edit site layout" option of "more".


Thanks Google!!.....not

We then had a quick look at using 3 columns instead of just one on the layout option so that it is easier to layout buttons that you can make on Cooltext.com to link the site to other pages on the site or external web pages.

Not bad for an hour and the chocolate biscuits always help...

Monday, June 24, 2013

Using Google Apps to collaborate on Film Planning

I am a Year 9 tutor this year and I asked my tutor class if they wanted to make a movie for the Manaiakalani Film Festival. Some of them were keen to as they have been part of it for the last 5 years while they were at intermediate and primary schools.


Who wants to do what...

The first job was to find out who wanted to do what job. I did this via a Google form with a list of jobs they could sign up for.

You will have to scroll through this one....


The results came in from this so I could see how many of the group were keen.
It seems like a small number at the moment but I think once we get started, the others will want to jump onboard.


The Theme

We did the next job last Friday, which was talk in tutor time about possibilities for a theme for the film. We started putting those up on a Google drawing, which was shared with them all so they could continue to put their ideas on over the weekend. Some "interesting" suggestions came in which we had a laugh about this morning.


Voting for the Theme

These suggestions have been put into another Google form and sent to the group so they can vote on their top 3 choices.


This has been emailed to them tonight so that there is time for the results to come in and be ready for the script team who are having their frist meeting on Wednesday after school.


The plan for the the script meeting is to do the planning on a Google drawing then to move to a shared Google doc for the team to input into.
It is interesting producing a project this way as I dont actually teach my tutor class and I only see them in the morning and afternoon tutor periods.


26th June

We had the first meeting of the script crew. These are the students who put their name down on the form to choose what they wanted to do.

The winner is...

We kept checking every day on the voting results coming in and Google forms presents it really nicely as a graph for you so you can see straight away what the results are.
Here is a screen shot of the results :-


So Vampires, Zombies and a last minute vote for fruit and veg it is...!!!!


Ideas......

They had the three main ideas to go with so they started a Google drawing to put down any silly idea they could come up with so we could talk about them. We sat around one computer talking with one student doing the typing of everyone's ideas. This drawing has been shared with the script crew so they can add to it in their own time.

The favourite at the moment is a film trailer for Plants vs Zombies the Movie.... we shall see...
The next meeting is Friday so we can start a story board to work on over the weekend.


3rd July

The planning team met to do the scene breakdown plan.
We did this on a Google doc that os shared with the team and we broke it down into the action, who would be in it, what we would need and where we would film it.
This breakdown will help the props team who need to start work next as we now know what we need.


What do the students think about the room changes?

My classroom has been changed around for a couple of weeks now and I have been chatting to my students about what they think about it.

The back tall table...


The boys gave me comments like :-
"love it"
"it's easier to work at"
"it is more comfortable to draw at"
"I feel like the man sitting up here"... ( please feel free to ignore that one !! )

This table has been a popular option for the boys when they are coming into the room, to the point of having a few "words" with each other as to who sits there.


The comfortable sitting area at the front ...


The students have said :-
"We like that we can work on our netbooks in comfort"
"We feel like we are in prison at the normal tables"
"it's kick back" ... ( but I hasten to add that they work in this area and I have only had one "kick back" example to deal with in two weeks ).

I have not told the students where to sit when they come in. They have moved to the normal tables naturally if they have drawings to finish and have gravitated over to the the couch area when they have netbook work. It has been interesting to watch them decide for themselves without being nagged.


Spoilers....

It is that time of year again when I have to start thinking about the Manaiakalani Film Festival. Actually, we are starting a little earlier than usual this year and I am so pleased we are. In previous years, my team and I have made a variety of movies for the festival but the thread running through them all has been music and dancing. This is the first year that we have actors and a script.
We have had our script meeting, which was a very funny session with everyone throwing their ideas in, however silly they were. These were sifted and we settled on a story line and came up with the script, which done on a shared Google doc, so it has gone through a bit of "adjusting" since then. This is the first time I have used a script so this is very exciting and I am wondering how much we can keep to it when we start filming and how much we will "wing it".
The script threw up a number of things that we had to get together before we can start filming, including main character costumes, props and sets.
The set building is the main reason we have started early this year, but it is well underway.

Here are some in progress shots of students preparing the sets.
I hope they don't reveal our theme this year as that is a secret!!

We love glue guns, card and masking tape...


Covering the wall with card and painting it...


The lovely boys from the furniture making course helping us do the heavy building....


You can never have too much paper and glue to hold all the bits together!!!


So far, we have involved the English department for the script writing, the Furniture making boys for the big building job and students from a variety of year groups.
It is turning out to be a year of quite a few firsts for us while making our film festival entry.

I am not sharing the script with you......spoilers.....

Saturday, June 22, 2013

Late Night Chats on Google Docs

I had my first experience this week of talking to a student on a Google doc late at night.
I had set my tutor class their blog homework this week to write about respect. I always give them them the option to send their homework to me either via an email or a shared Google doc. The deadline as always was midnight on Thursday ( so that it gives me Friday to kill them if they don't do it..!! ).
This Thursday was the night of the big thunder storm, so at 11.10 I was still up on the couch, browsing about on the net. An email came though that one of my class had shared a doc so I clicked on it to do my usual copy and paste onto their class blog. Link here.
When I opened the doc, Caroline was still writing on it, so I went further down the page and sent her a little comment. This opened the door to half an hour of back and forth fun. It was nothing educational but I found out where she lives and the fact that she has to get the train in every day. We had a joke about me expecting being paid for things in chocolate or pictures of Johnny Depp. ( Can you believe she didn't know who he was!!!..I soon put that right ! ). We then reached an agreement that as this was the first week that the the whole group had hit the deadline we would celebrate with a fish and chips shared lunch.
Like I said, nothing educational and if this had been a piece of work where the doc had to be marked, then I would have used the comments down the side. As I copy and paste the relevant bits onto their blogs, I wasn't bothered about typing directly onto her page.
It was an interesting insight into when the students are online doing their work and that they appreciate a bit of back and forth feedback, educational or not.

Wednesday, June 19, 2013

Bloggidy Blog....

It's the second week of our Wednesday afternoon help sessions, and we covered blogging basics today.
I had a group of staff who had never blogged before, so that made it an easy session with no differentiation needed.
We started right from the start, finding blogger, starting a blog and finding a url that no one else has. We covered writing a blog post, inserting a picture, then moved on to getting the html embed code from YouTube so they could embed a video.
What really caught everyone's interest was the use of labels and a label gadget down the sidebar. As first time bloggers, this interested them the most as they are planning on doing whole class blogs so will use this labeling system with the students names in order to find al the posts by individual students. I showed them how I do this with my Year 9 tutor class. Link here.
The hour session went over quickly with everyone logged onto a computer, making their own scratch blogs and having a real hands on go at everything. They all went away with plans on which classes they were going to use this with so they can have a go with the "proper"stuff.
We had a good selection of chocolate biscuits this week too!!


Wednesday, June 12, 2013

Wednesday Afternoon Help Sessions

Recently. Russel our DP in charge of the whole blended learning thing ( and its a LOT to be in charge of!! ), sent out a Google form to get staff feedback about their PD needs.
It turns out that the consensus is that after school sessions and department sessions are what people want! So we sent out a google doc, with a list of sessions each week for the rest of this term. Here is the link. Staff can sign up to what they want as to where they judge their needs are most after doing this for over a year now.
Our first session was today and it seemed to go ok. I had 6 people interested in working on Google calendars and they were so keen that they got there before me !
We covered real basics like making an appointment and then moved on to sharing calendars with others, putting in information that can be seen by others and then we had a go at inviting each other to made up events.
What was popular next was making multiple calendars and then embedding them onto a Google site so that students can see the course planning on a calendar.

As I have been using my calendar A LOT and have loads of different ones for all sorts of things, I didn't think it best to show the start up basics on my own, so I made a dummy account today.
It is under the name of my dog, Bobby.
What is worrying me now is that when students are sharing their work with me they will accidentally share it with Bobby instead, as he is in the system as Bobby Ferguson. Never mind, as long as he does the marking!! So far Bobby has a gmail account, a calendar with appointments on ( apparently he does Social Studies ) and a Google site with his calendar embedded into it.
Next week he will be making a blog as that is our next topic.

The general feeling as they left today, was that they need to practice in order to get it firmly in their heads, but that is the same with all of the this Google stuff. If you don't use it regularly and do it, then the next time you try you have forgotten how to. It explains why I have to show the same people the same things over and over again.

This Pd session was powered by timtams supplied by management :D


Tuesday, June 11, 2013

All Change......

I was inspired this week by a visit to the room of a fellow teacher. She had turned half of her room into an easy seating, couch area, where students can sit comfortably to use their netbooks in a different atmosphere and environment.
So today, I had a re-arrangement of my own furniture. I already had a couple of items of furniture that I could use from when TCTV did interviews for assembly.
My room was laid out in groups of tables with 6 computers around the sides of the room.

Here is how I have changed it....

A couch and easy chair in a set up with a small table. This is near power sockets for their netbooks and next to the bookshelf. I plan to get a couple of bean bags for this area too, as there is still plenty of space. Here, students can sit comfortably to either work on their netbooks or access the design books on the shelf. They can sit on the floor on the rug, using the low table, or use the bean bags.


I have added a high table at the back of the room, with a couple of stools. This table can be worked on stood up too.


I still have groups of tables, as the students need to be able to sit and do their design work on paper. The desktop computers are all down one wall now.


I thought that this would make my room feel cramped, but there is still plenty of room to move around, which is important as my students need to be able to move around the room to get things that they need.

Here is how it was used when my senior students came in this afternoon.

Working at the tall table...
I am not convinced I like seeing their backs ( being suspicious!! ) I may pull out this table from the wall so the stools can go on the other side.


On the couch with a netbook...


On the easy chair by the book shelf...


A more unusual use of a low chair with the high table. Chin level with his netbook!
He says he was comfortable!!...hhmmm...


I didn't get to see the changes used a lot today, as a lot of my senior classes were out on work experience and most of them are in the middle of design drawings, where they need the tables.
The reaction of the students who came in and saw it was interesting, as they were interested in the changes and what I was trying to do.
I look foreword to seeing how it changes how they use the space in the room and how this affects their work.

Wednesday, June 5, 2013

Designers and Slaves....

It's exam week this week and while other subjects are sweating under the pressure of external exams, we are having a bit of fun in DVC. ( Design and Visual Communication ).
Instead of trying to keep on task for 2 hours on project work, we are doing design activities.
The first one we are doing is being designers and slaves.
This activity was inspired by watching a video of the architect Frank Gehry working in his workshop with his team.
The students are sitting in pairs and one is the designer, who is only allowed to explain what they want. They are not allowed to help or do any of the work. The other student is the slave ( or "bum boy" as they put it !! ), and they can only do what the designer tells them. They are not allowed an opinion or to make decisions themselves.

They have white card, a pair of scissors and some tape. That is all.
Their task is to design and make a model of a road side bus shelter.
They have 40 minutes to create their design then we swap over.

Here they are just as they were getting to the end of the first session.


Feedback from the students is that it is hard to just give instructions and not do it themselves. They are frustrated at not being able to help and do it themselves and find it hard to just describe and explain what they need someone else to do. It equally hard for the slave, as they have to try and understand verbal instructions about a design they know nothing about.
They didn't realise that I was checking out their communication skills!!!
I am interested in the fact that they did not find the 40 minute time constraint to be the main issue. If this is the case, why can't they get their course work done on time when they have weeks!!.
Watching them during the second session, it was really evident that the students who had just been the slaves and were now the designers were finding it really hard to keep their hands off the work. 

For voting, they have been asked 3 questions on a Google form.
1) Which design will best protect the passengers from bad weather?
2) Which design looks like it will fit onto the side of a normal road?
3) Which design is the best overall looking shelter?


I was reading out the results as they were coming in to the Google form response sheet. It inspired them to get the voting done if they didn't agree with what was coming in. I suspect a mild bit of cheating here even though they weren't supposed to be voting for their own ( note to self - collect emails next time!! ).

Here are their designs...


Monday, May 20, 2013

Netbooks and Crochet...

You get asked the strangest things sometimes.
While sitting up in B10 this afternoon, dealing with student netbook issues, a staff member came up to start her off on her crocheting as she couldn't remember how to do it!!

So..... Netbooks and Crochet.... does that sound like the title of  a murder mystery?


Saturday, May 18, 2013

Making Screen Casts...

I made the How To site a while ago for staff to dip into when they have questions and can't get hold of anyone to help them. It is definitely an ongoing site, with a slow build up of content.
I started on the site by doing lots of screen shots of how to do things and creating step by steps.
Now I am getting more into creating screencasts using Quicktime. There is an extremely handy dandy "new screen recording" option there.


If you don't have the Quicktime version that does this, there is an online programme called Screenr. This is useful, as you can also download the screen cast that you make so you have more control over hosting it.
Recently, after the 2 week break, I have had various staff members wanting refreshers on adding site pages onto the horizontal navigation bar and onto the drop down menus, so I decided to make screen casts to cover these two things. The first one took 3 tries as I hadn't made one for a while and kept starting to talk too early, and stumbling over my words. I got there in the end, but it is weird sitting in an empty quiet classroom, talking to a computer screen!!
Here they are....

Adding a Horizontal Tab


Adding a Drop Down